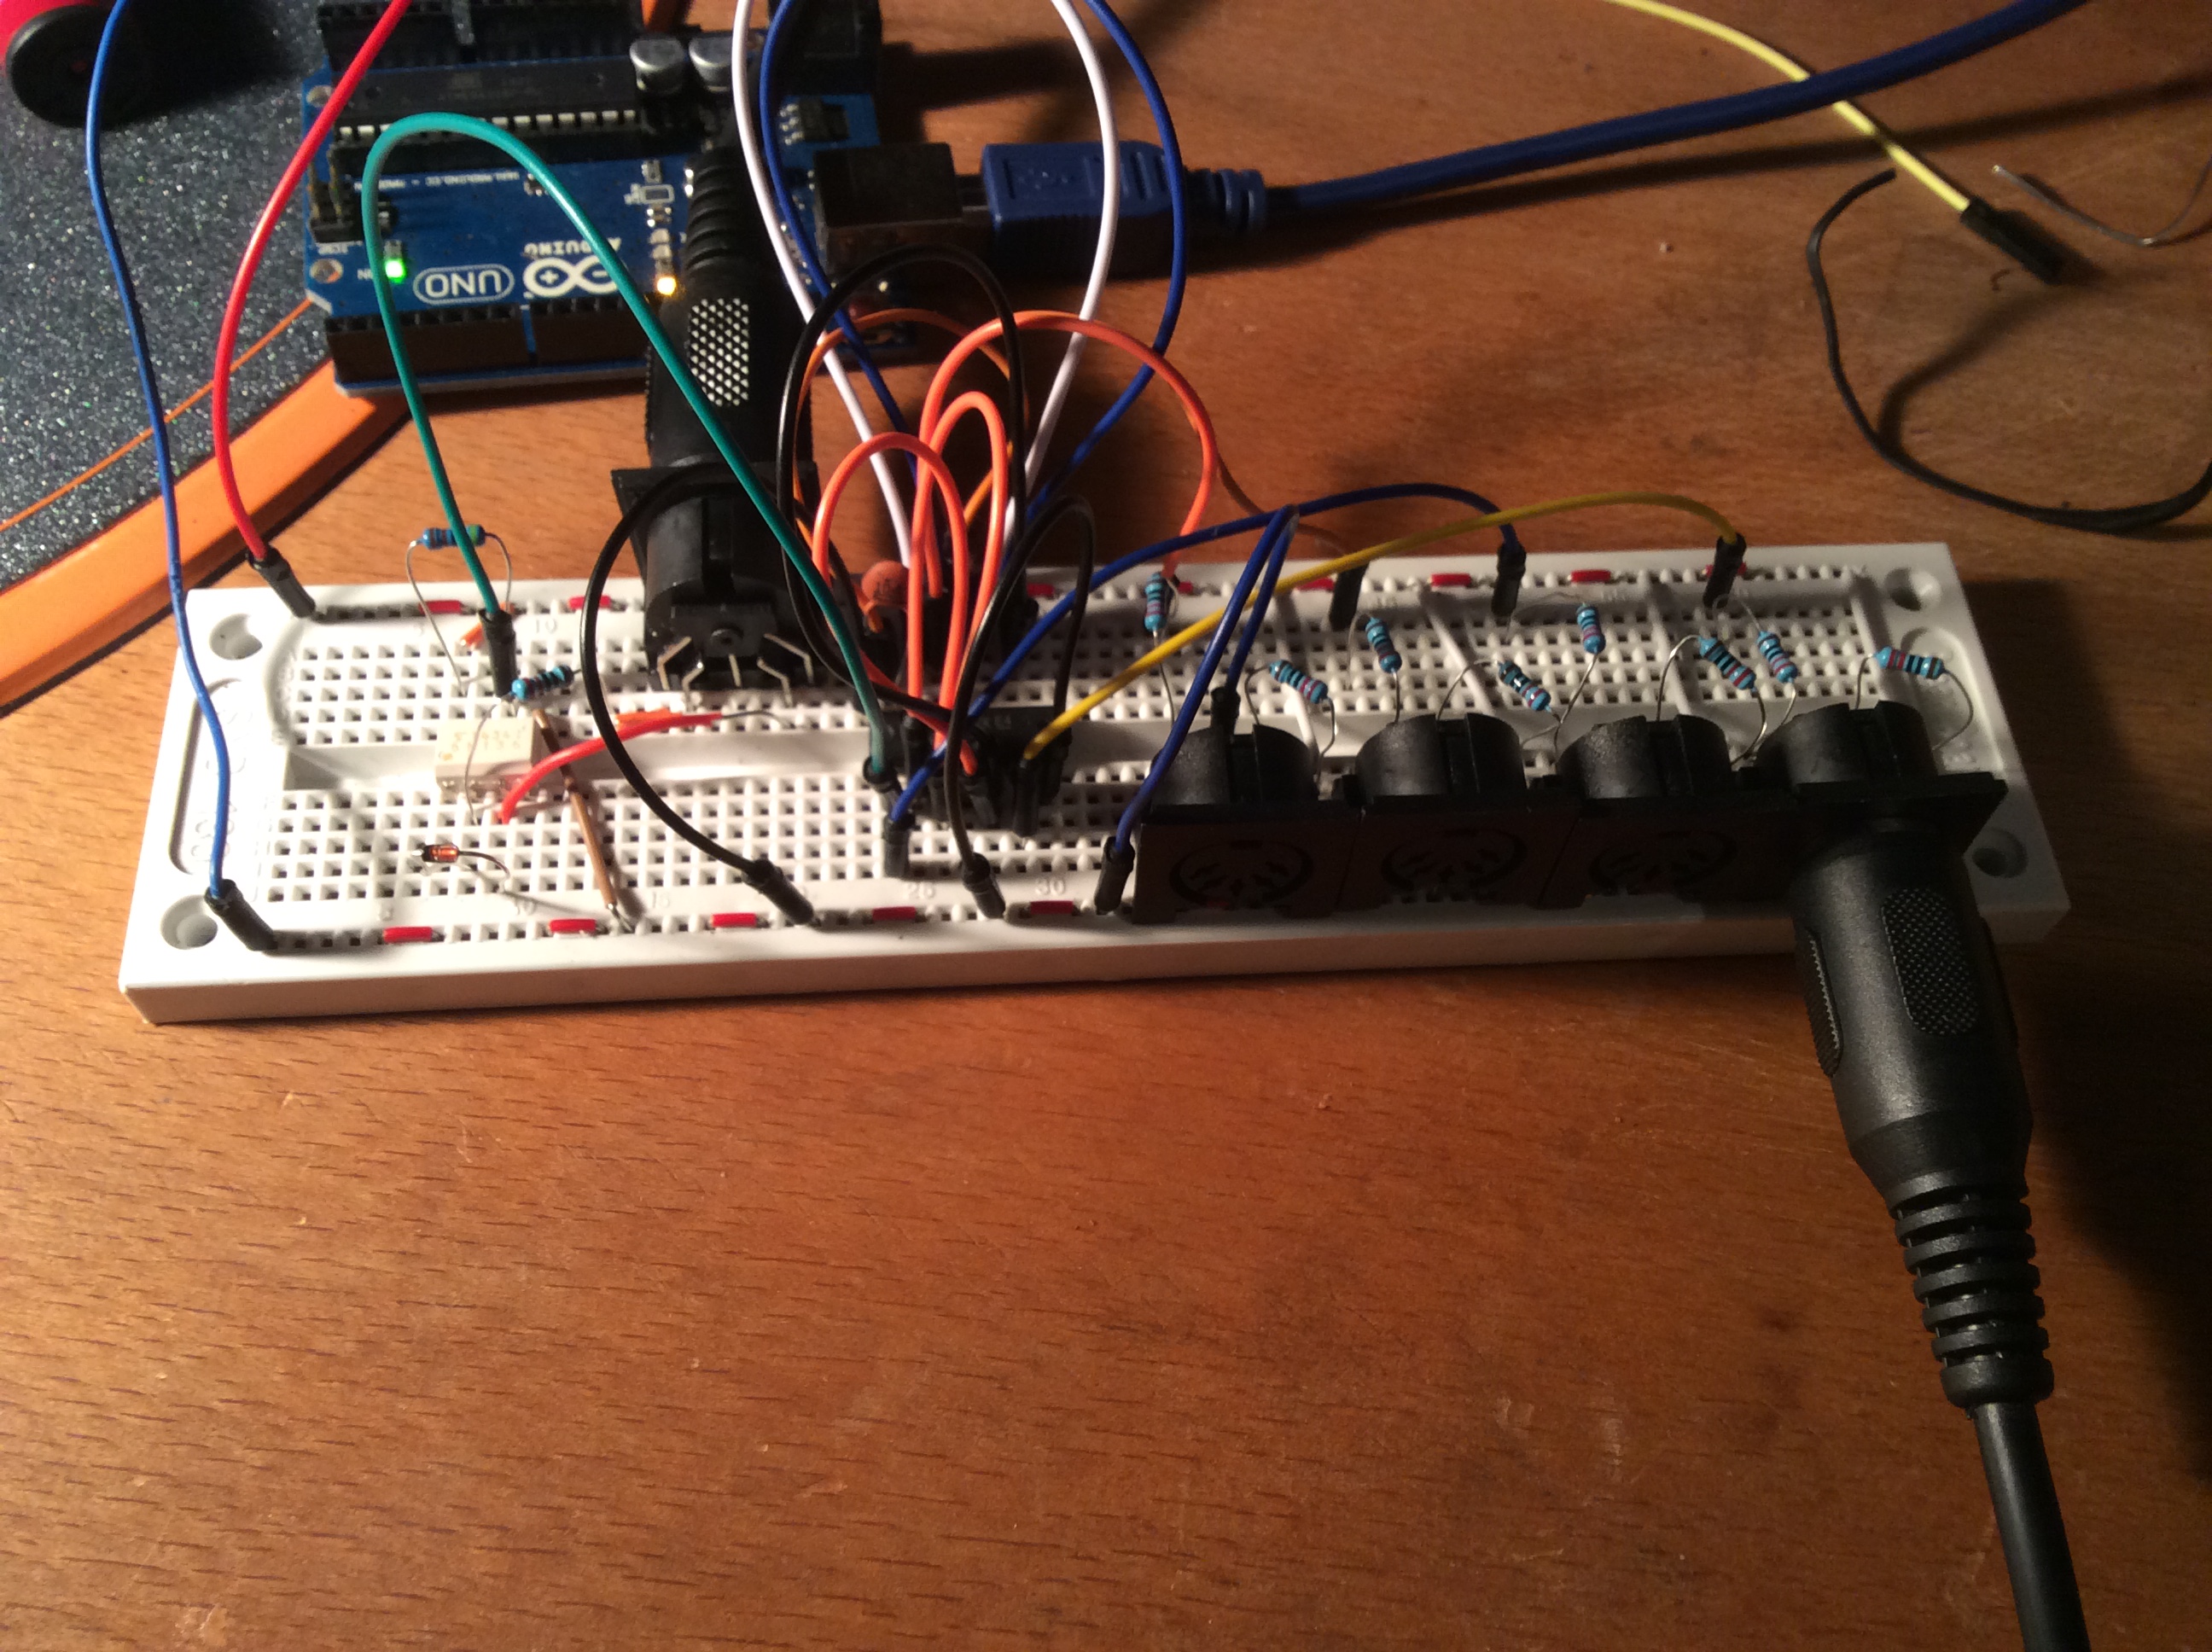
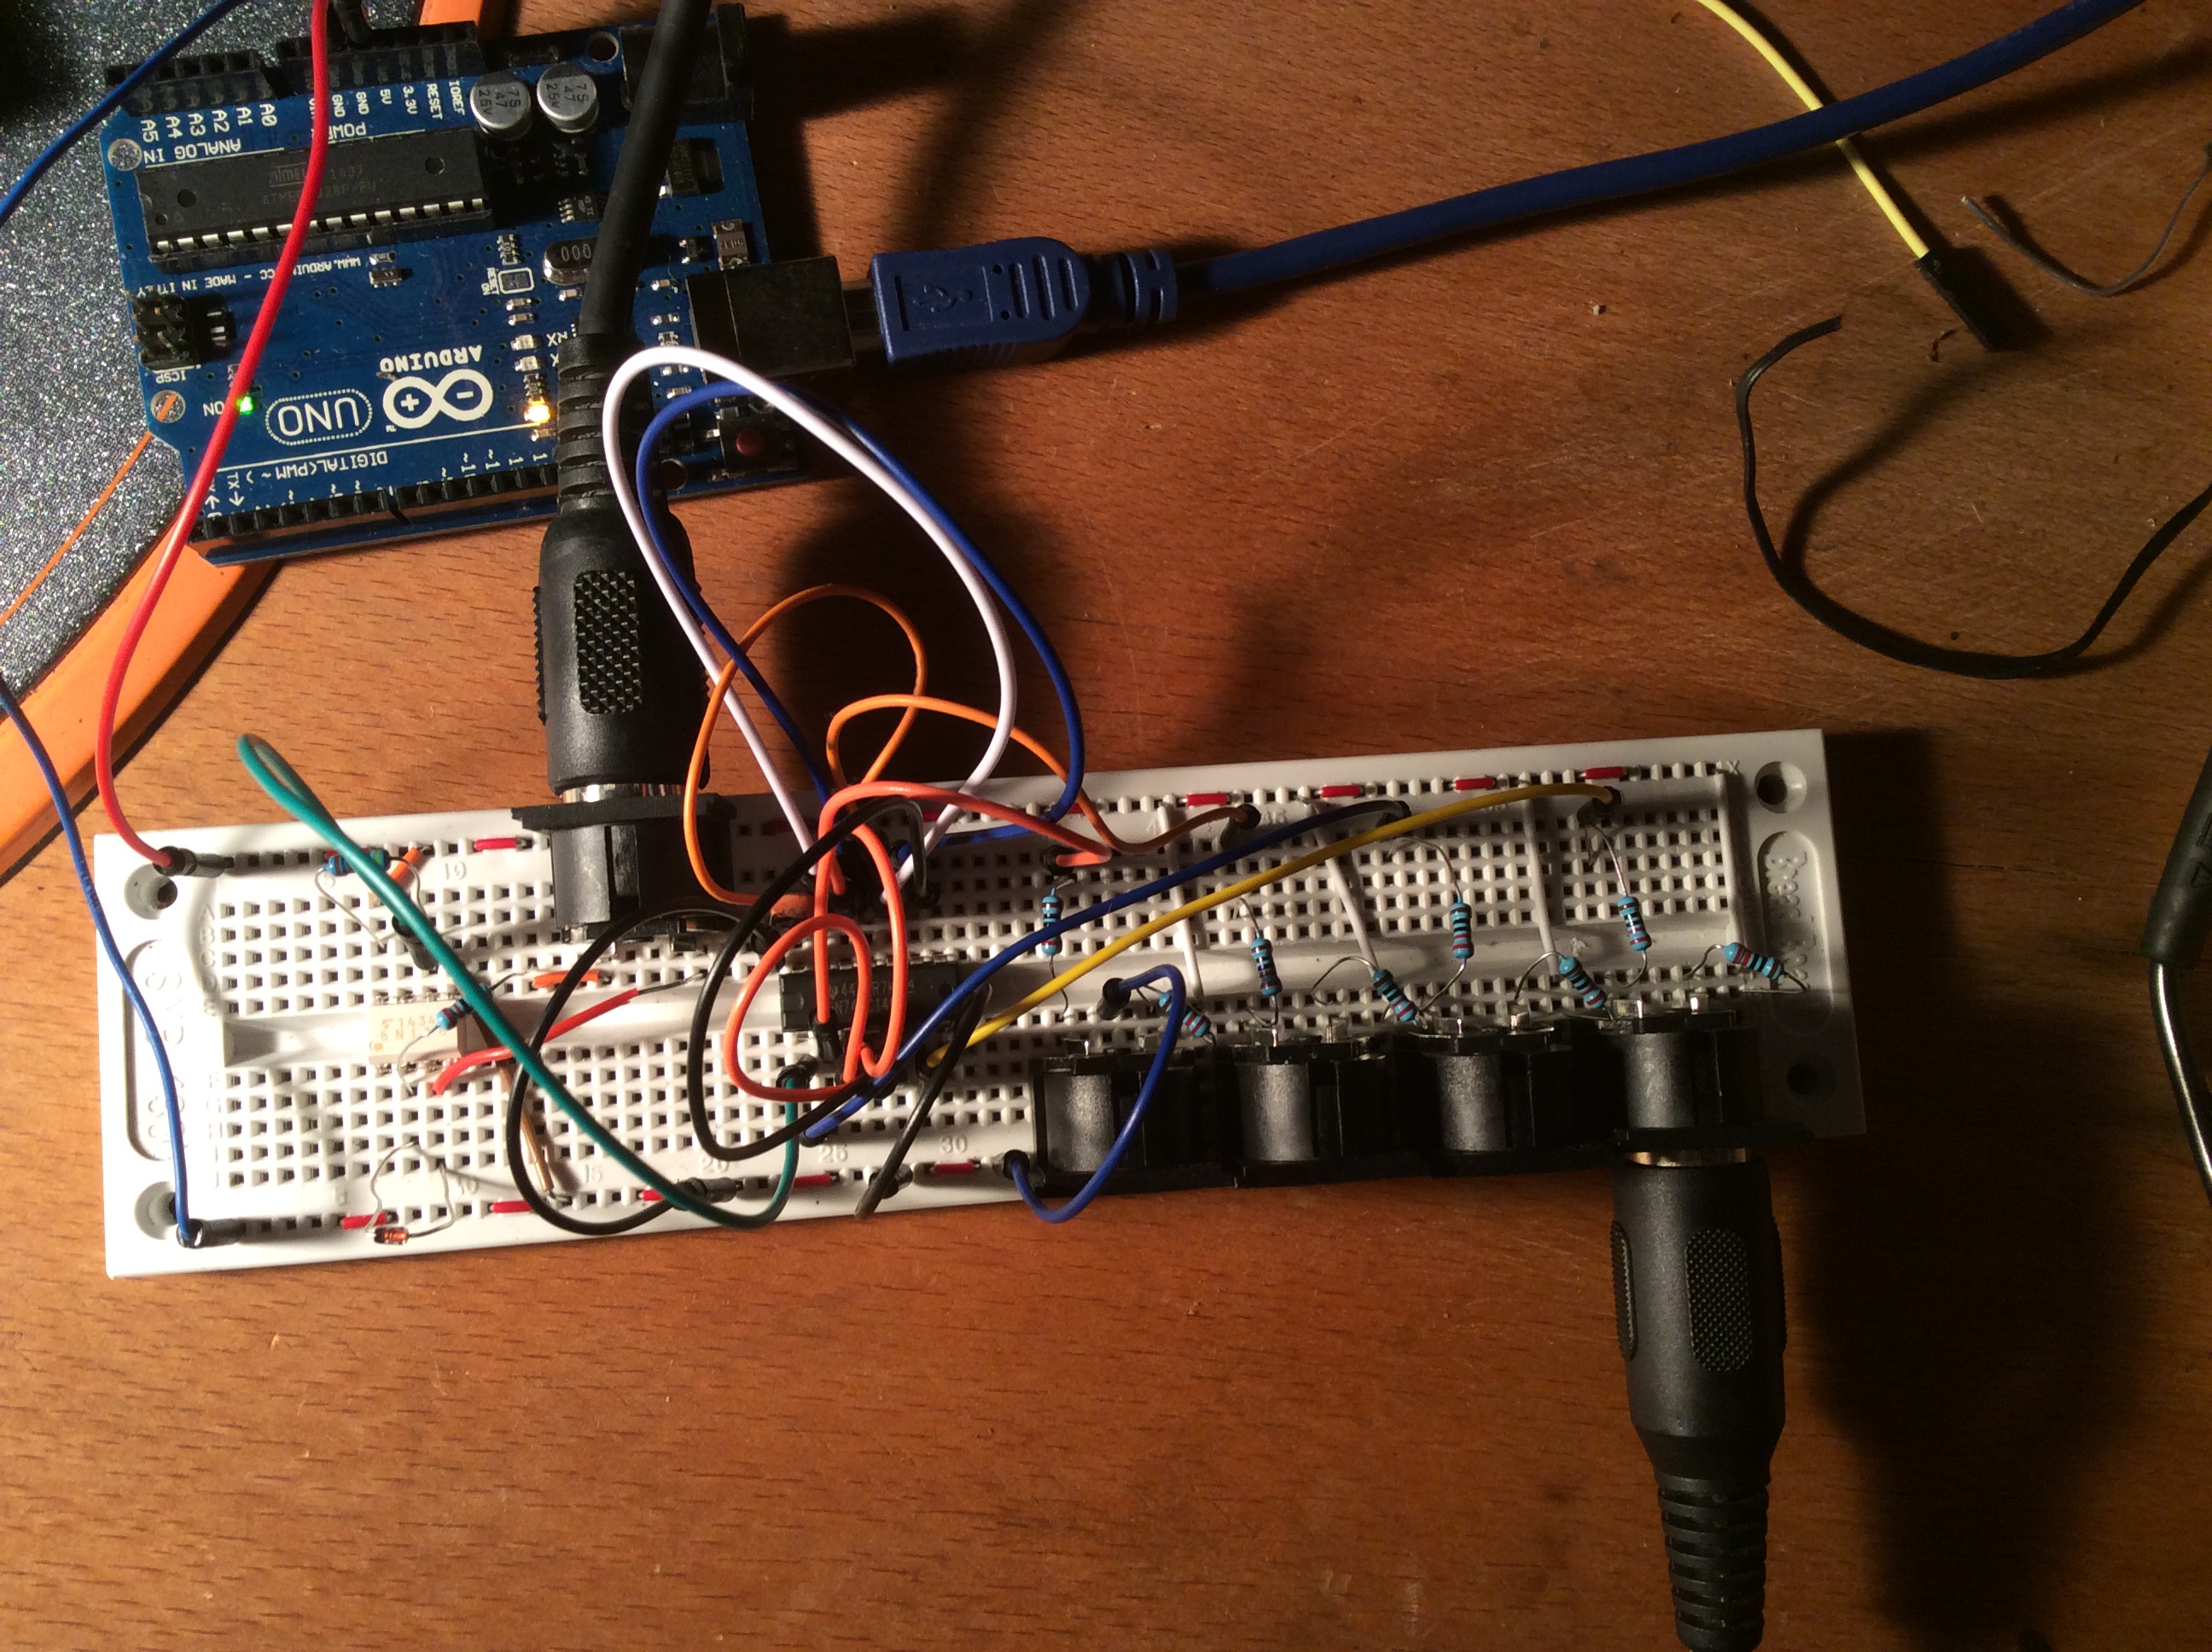
Tonight I’ve been trying to decipher the various schematics online for creating a midi thru box. My knowledge of electronics is growing but still very basic and even such a simple circuit gave me some headaches.
So here it is, a working midi thru, ignore the Arduino connected to the breadboard it’s only being used to supply 5v and nothing else. The soldered circuit board bellow has a 9v battery/mains input.
Bill of materials:
5 x MIDI connectors
1 x 6N136 optocoupler
1 x 74CH14 Hex schmitt inverter (or CD40106)
9 x 220 ohm resistor
1 x 4.7k ohm resistor
1 x 1n4148 diode
1 x TS7805 5v power regulator
1 x 2.1 mm power header
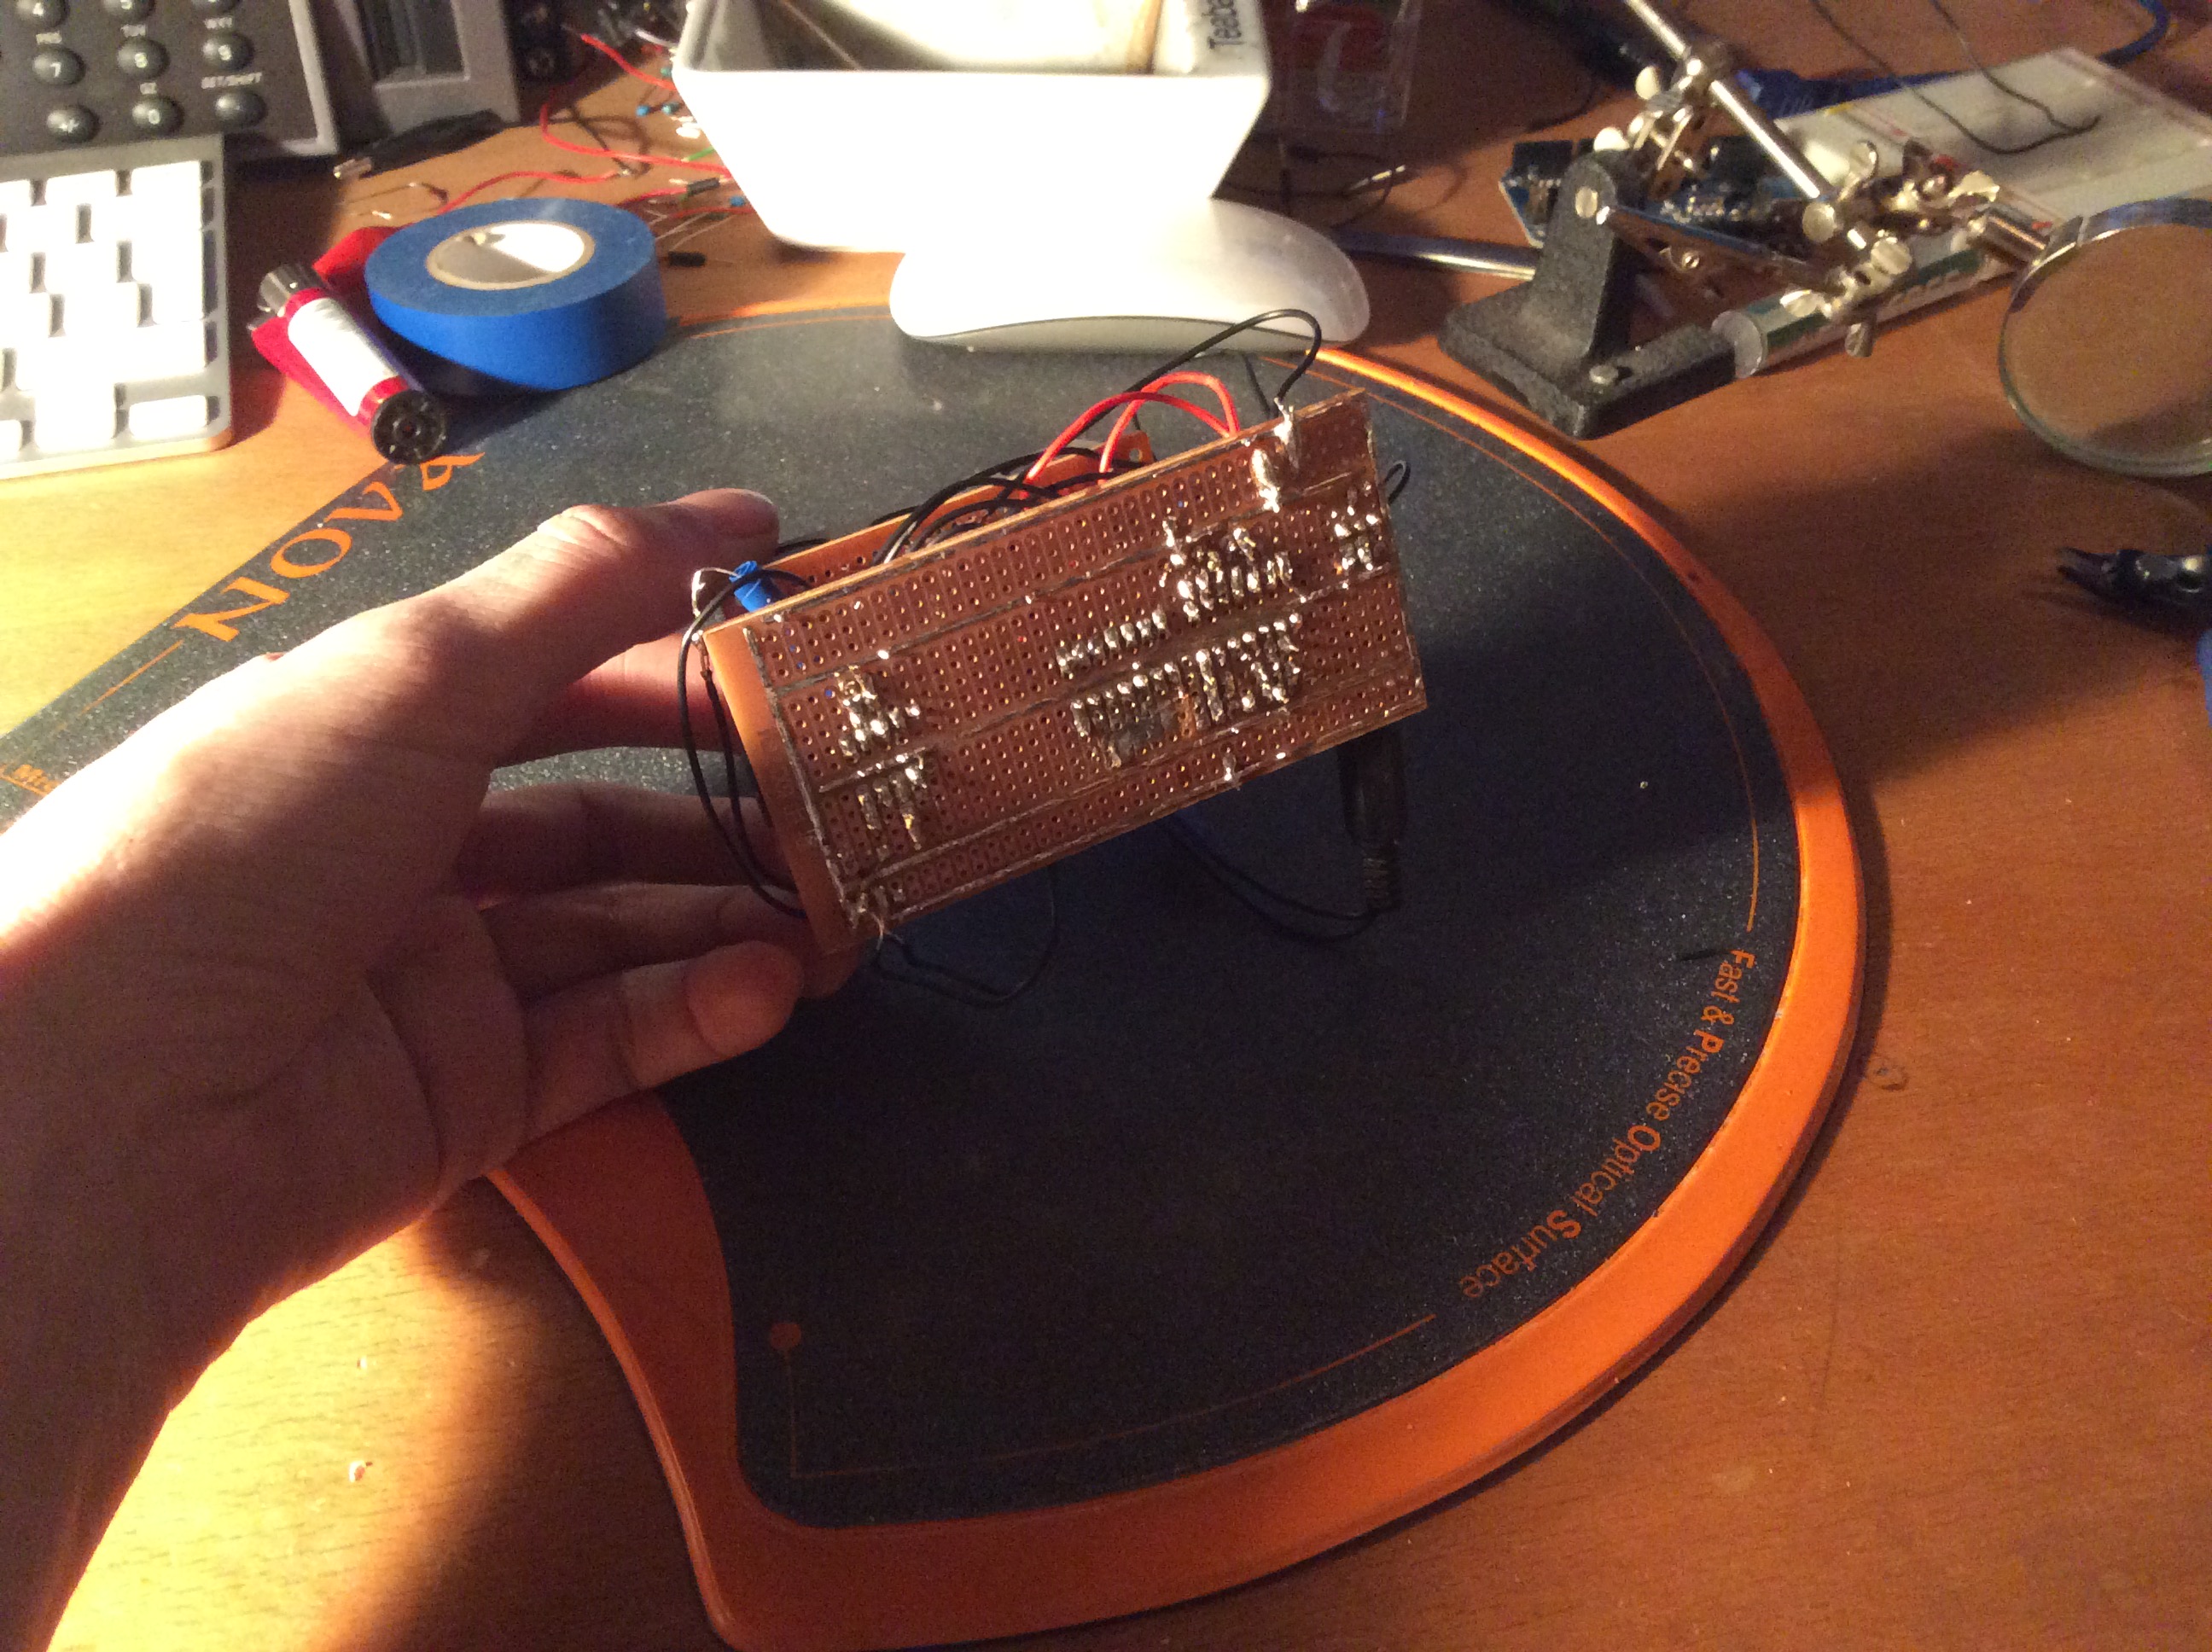
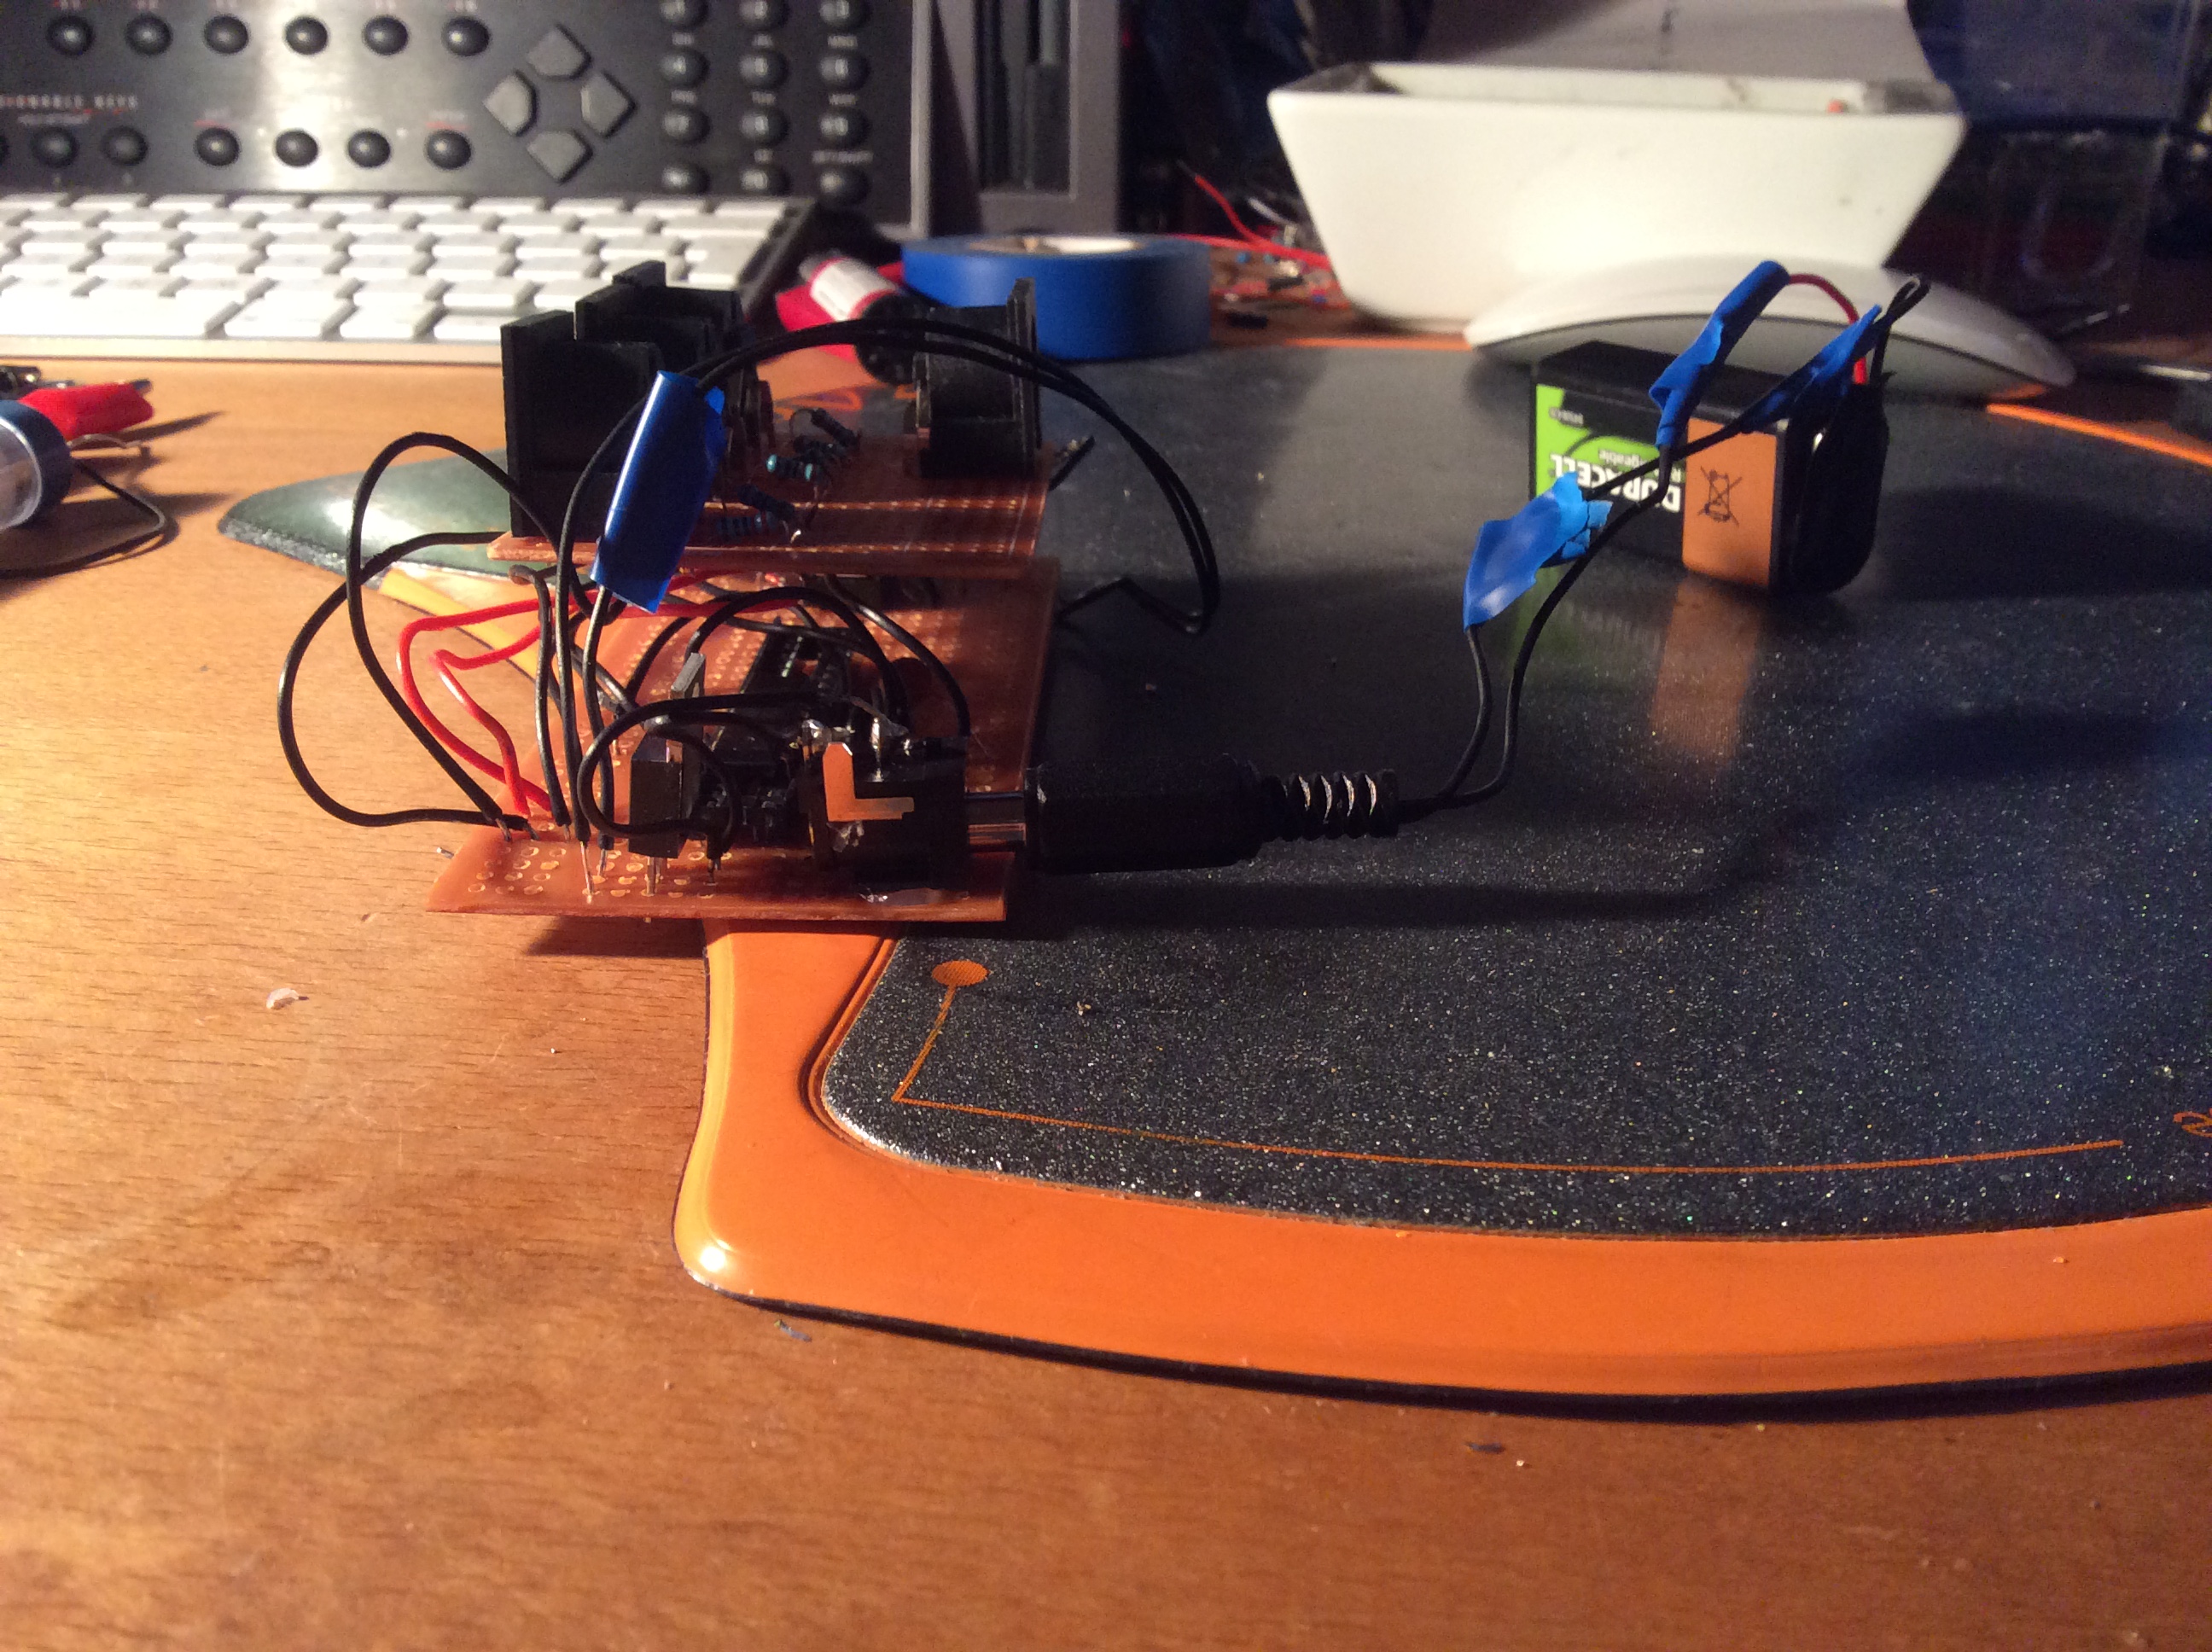
And then solder to perfboard circuit board. It’s certainly not pretty and some of the worst soldering I’ve ever seen but it works. 🙂
All I need now is some sort of case and I’m good to go.
I’ll try and update this post with more detail and clearer breadboard layout / schematic when I get the time.
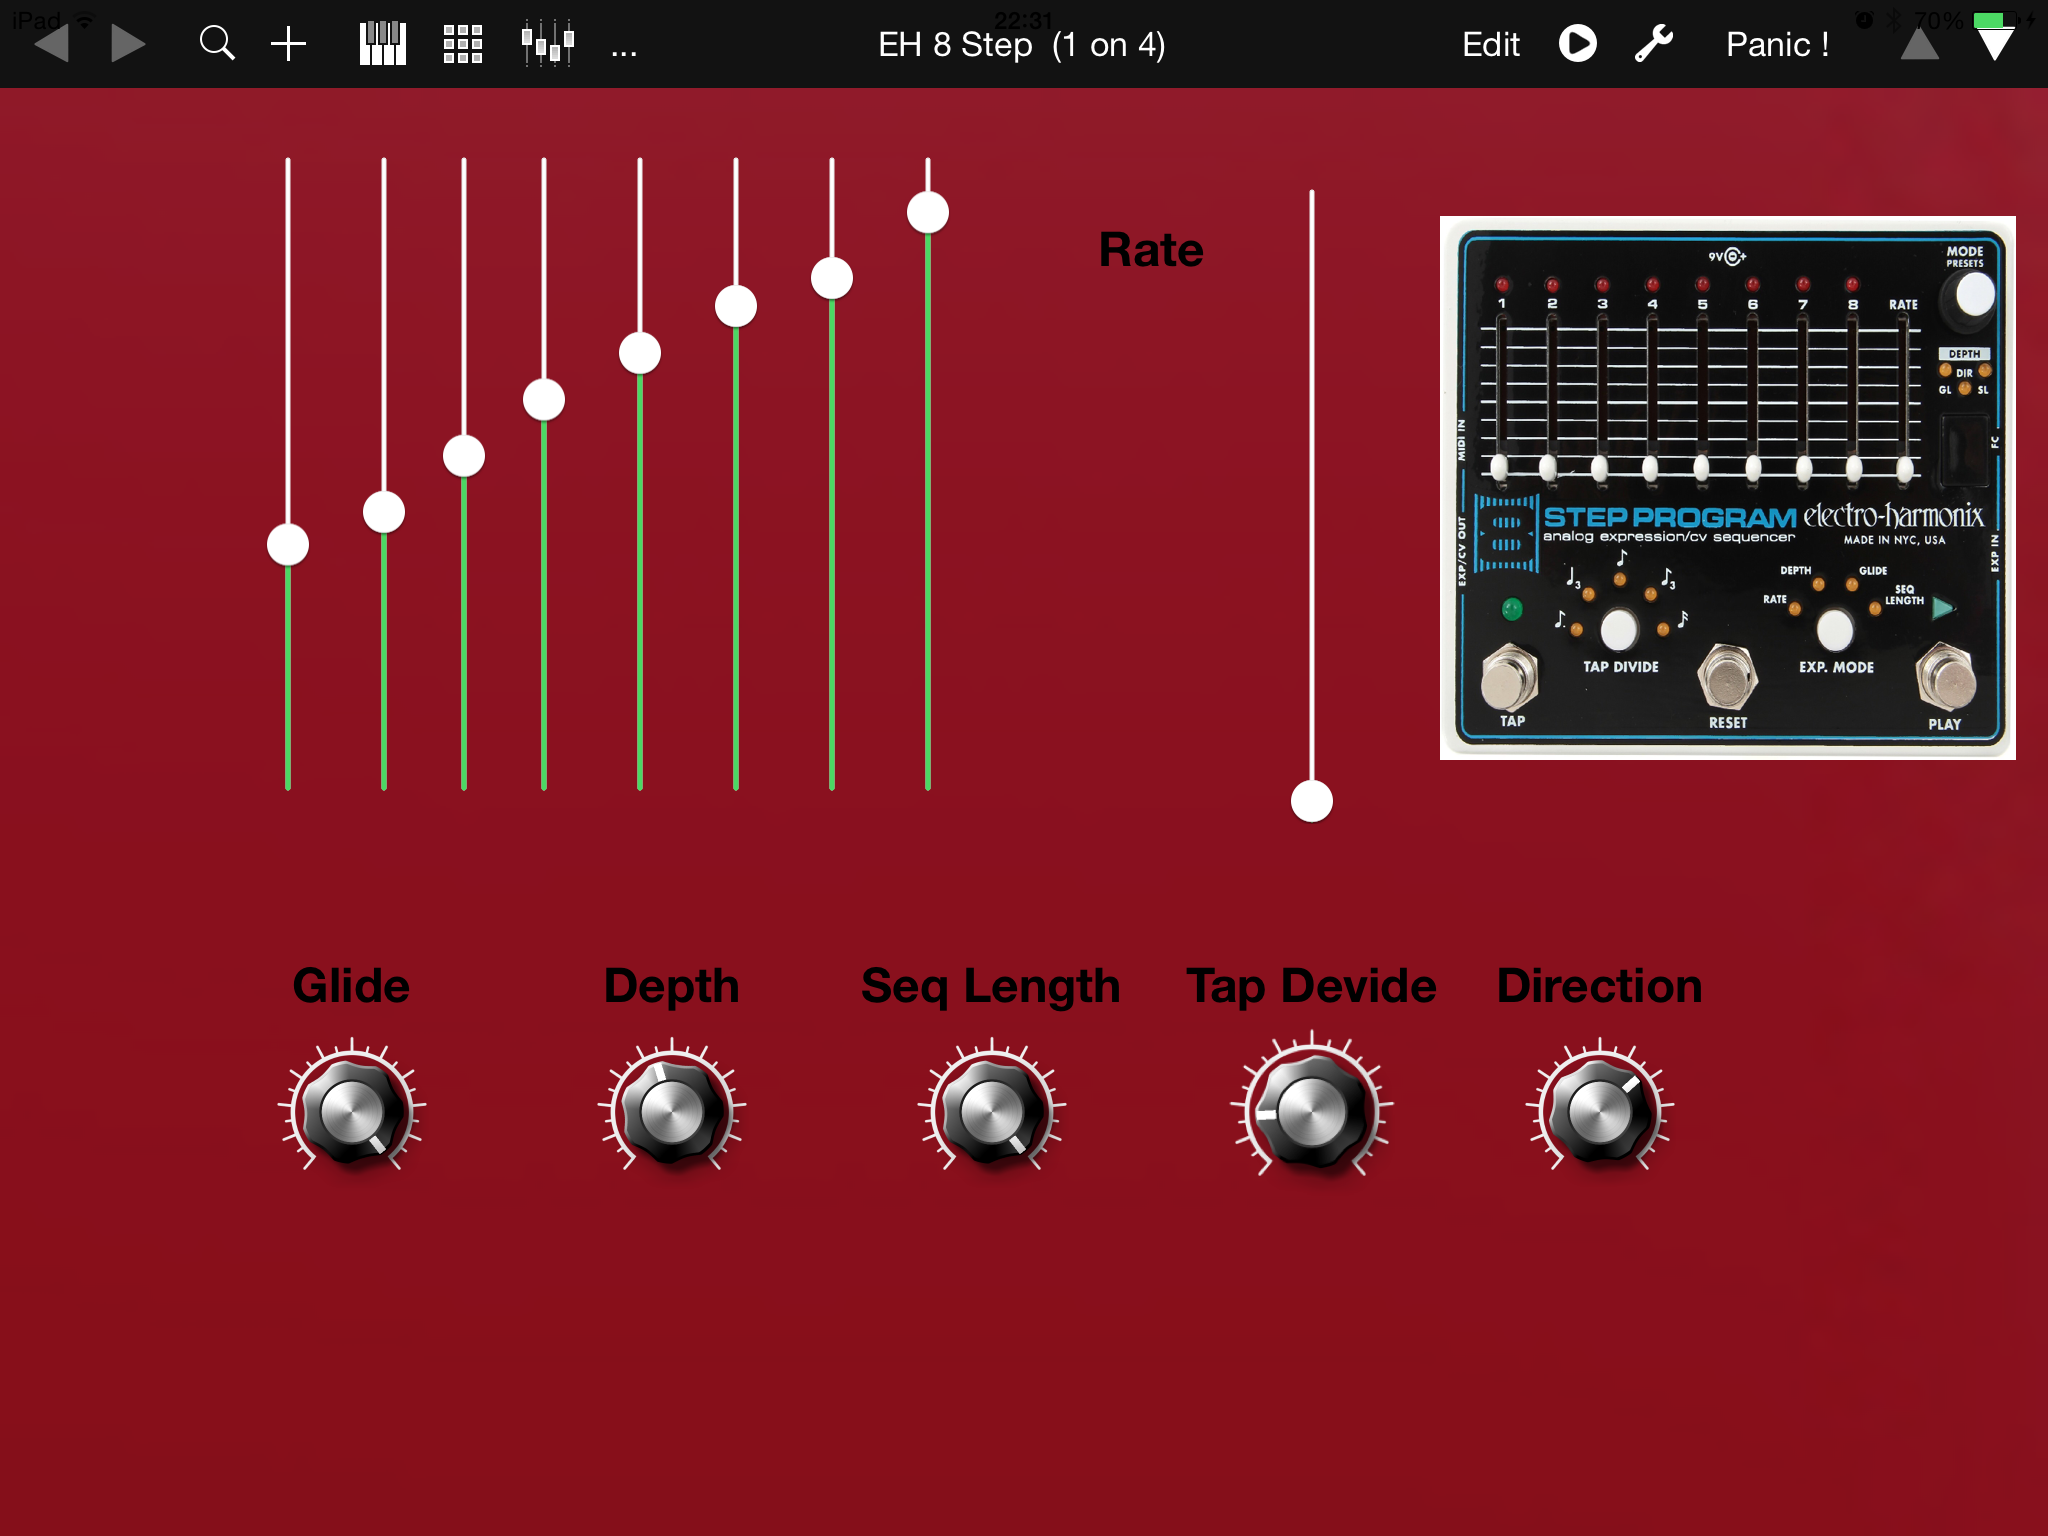
Tonight I created an iPad MIDI control surface for the 8 step using tb midi stuff which I’ve talked about in previous posts.
Here is a link to version 0.1 of the template with just the very basics implemented. The 8 step has a surprising amount of depth to the midi control. Download
I made a brief video on some of the integration between the Electro Harmonix 8 step and the Korg Ms-20 Mini.
The 8 step is an 8 step CV sequencer which can be synced and controlled via MIDI.
Here I take a look at replacing the MS-20 Mini internal LFO with a MIDI synced ‘lfo’ from the Electro Harmonix to control the low pass filter and frequency modulation.
I’ve recently been exploring the musical possibilities of the iPad and one of my recent discoveries has been the fantastic TB MidiStuff.
It allows you to easily create touch interfaces for your MIDI devices. Combined with the wireless midi functions of the iPad and OS X and it makes controlling MIDI devices wirelessly easy enough even for me.
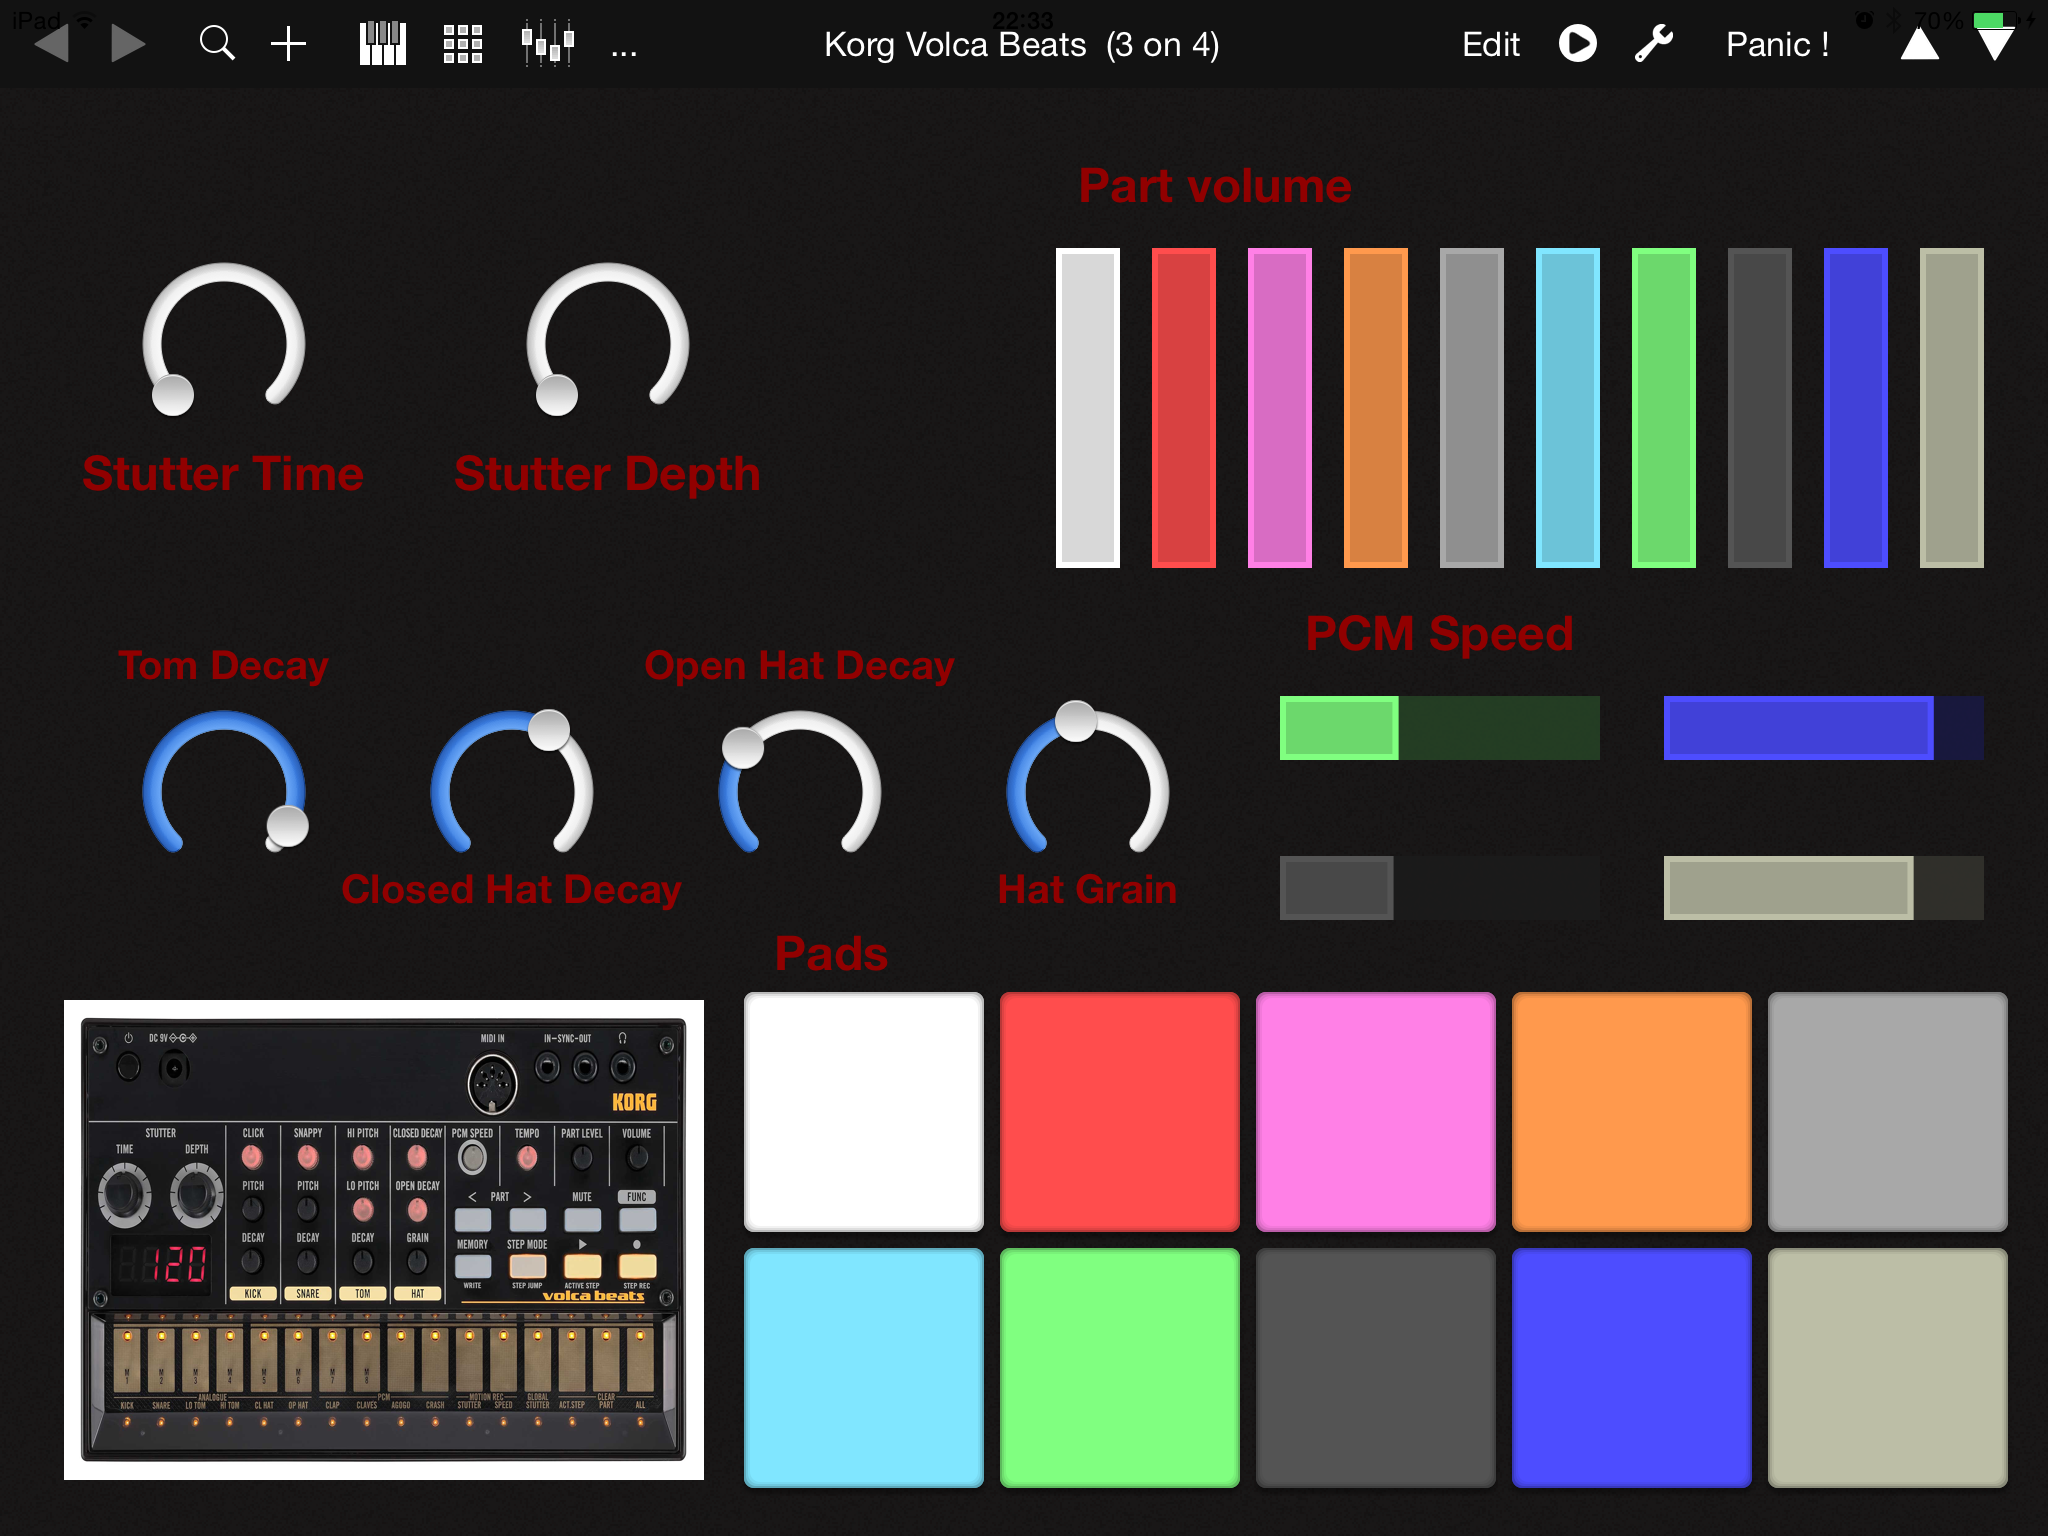
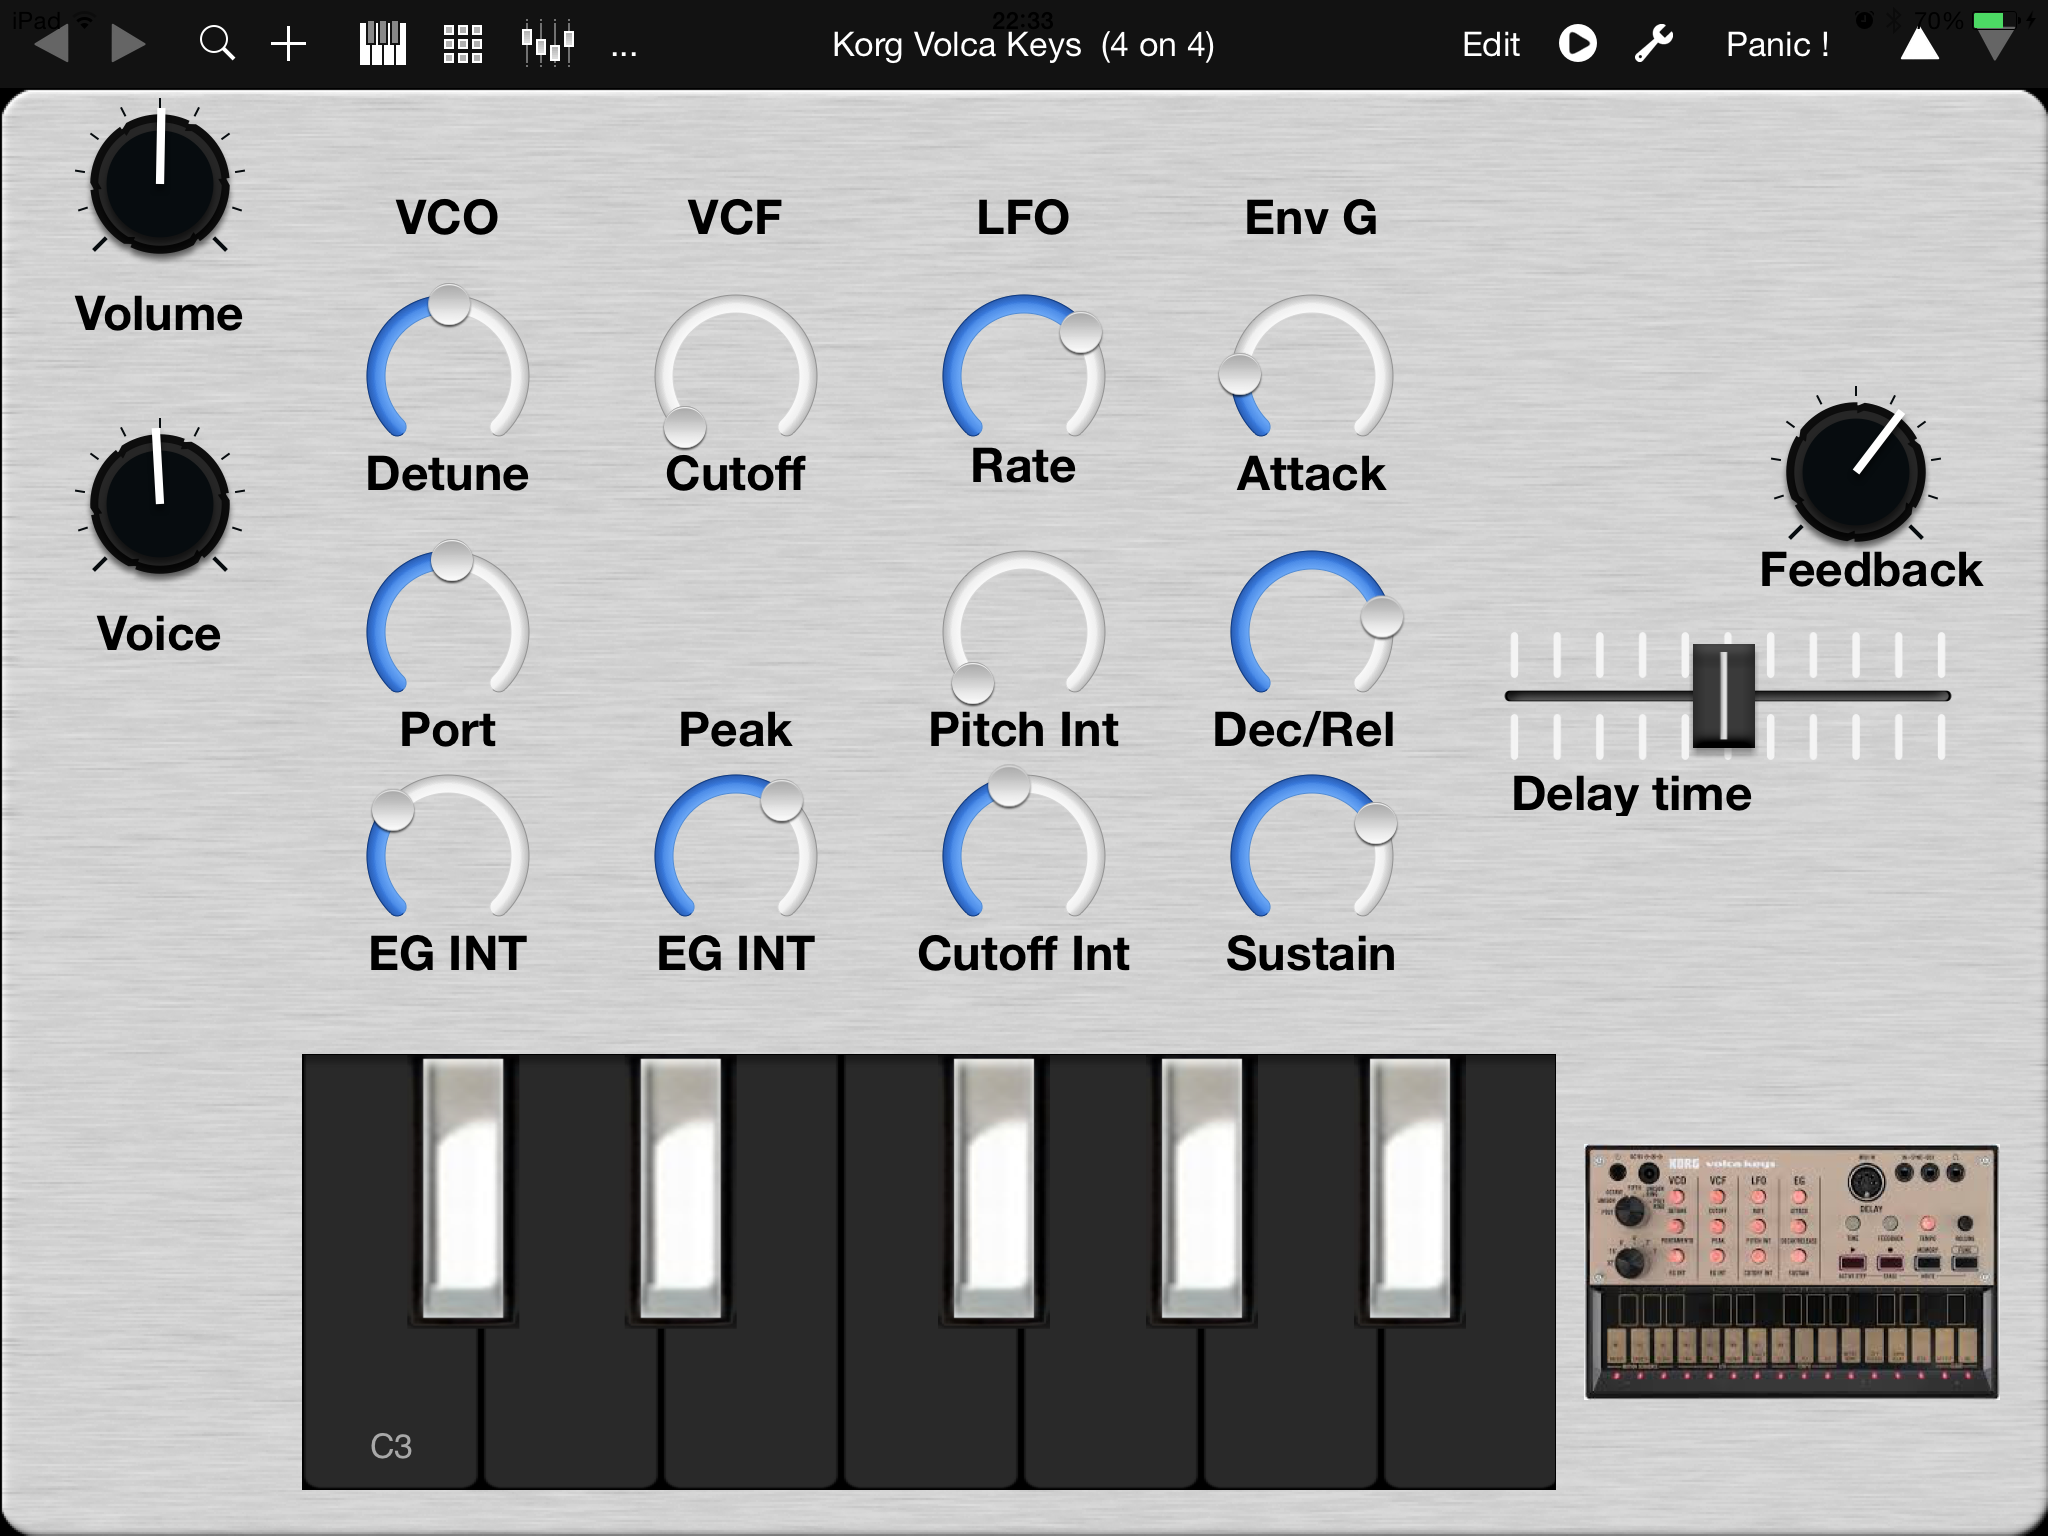
Tonight I sat down to explore what was on offer. I’ve got to say I’ve not even scratched the surface but in the process I created two “panels” for controlling the Volca Beats and the Volca Keys.
Unfortunately not every knob on the Volca’s is accessible from MIDI. The Volca Keys is missing the VCF Peak and the Beats is missing some of the most useful for shaping the sound, the kick click, pitch and decay, snare snap, pitch and decay, tom hi pitch, tom lo pitch. Obviously this has been done to save costs but it still gives us plenty to twiddle with.
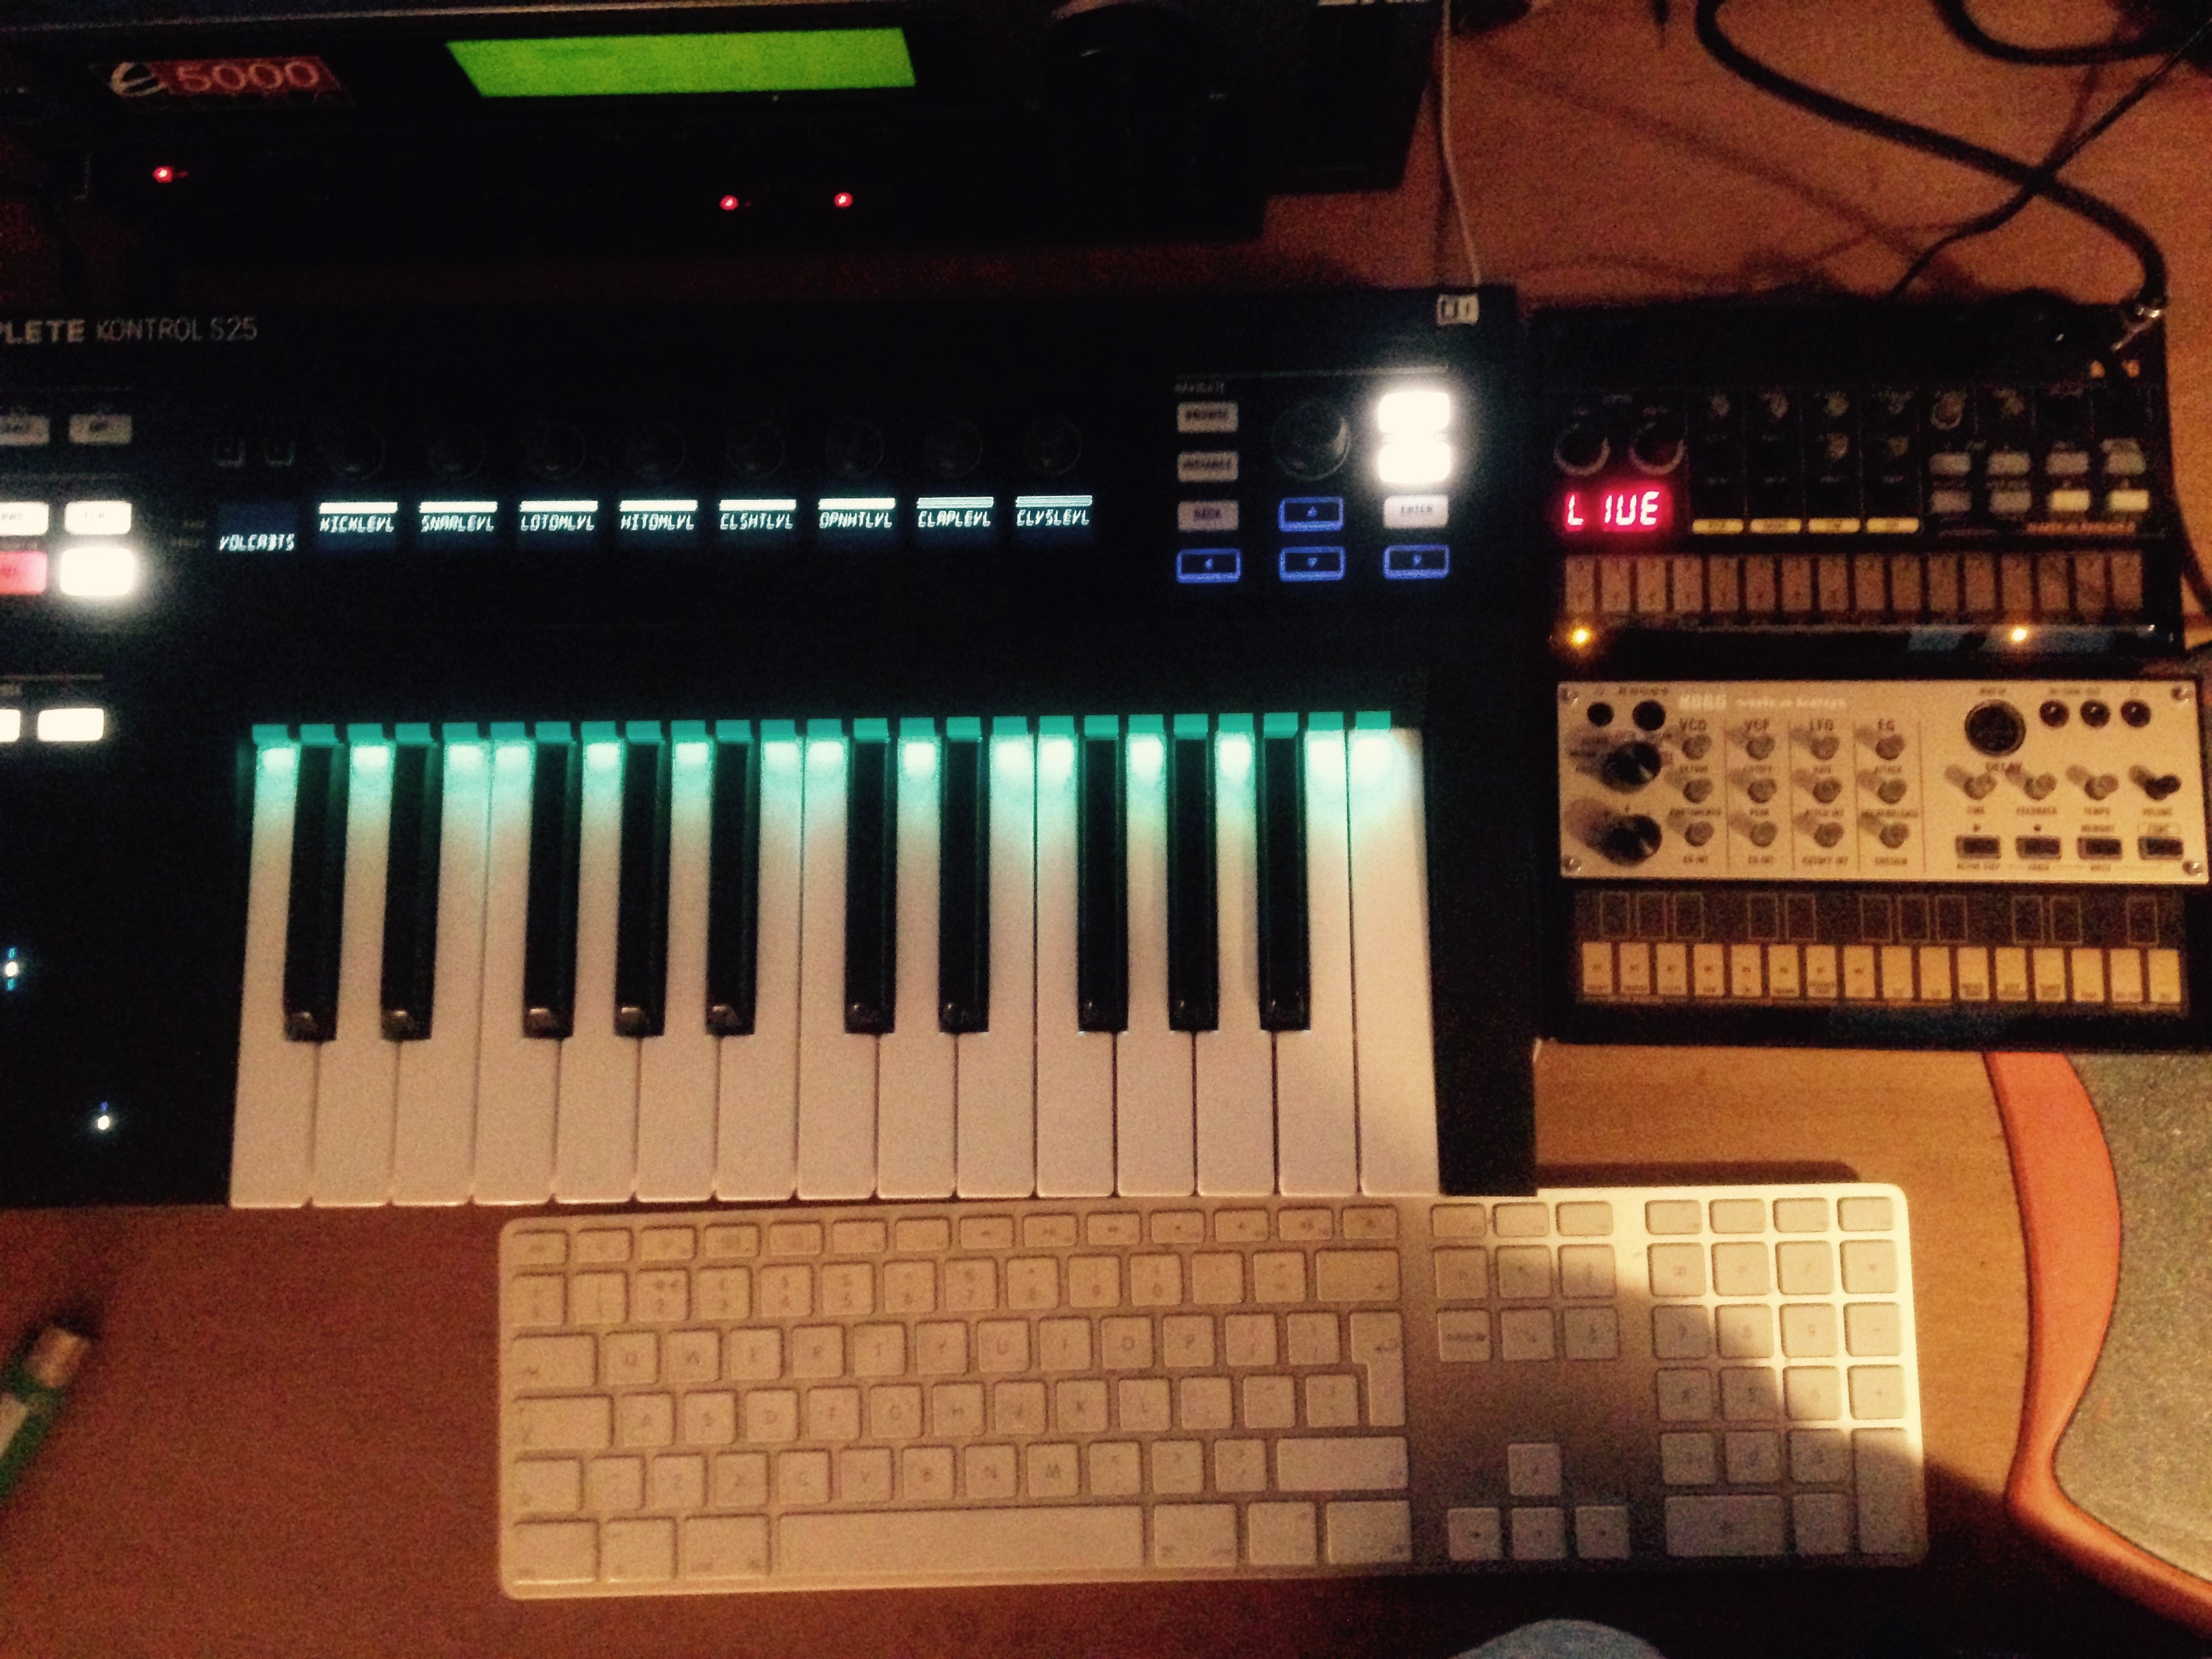
I wanted to share a few templates I’ve made for the Volca Beats and Volca Keys for the NI Komplete Kontrol S25 keyboard.
So far I can’t see how to use to assign more than 8 knobs per template so I’ve had to split them out across multiple template.
This is a major blow as so far it looks like you’ll need to take your hands off the keyboard and use your mouse to select between templates. Controller values will also rest to 0 when changing from template to template.
This could be fixed if we could use the bank select button next to the knobs but NI knows best. Hmmm.
I’ll be sure to update this post if I manage to overcome the seemingly bonkers restriction.
Here’s a list of the midi controls the volca’s offer:
PART LEVEL ADJUSTMENTS
(KICK, SNARE, LO TOM, HI TOM, CL HAT,
OP HAT, CLAP, CLAVES, AGOGO, CRASH)
PCM SPEED
(CLAP, CALVES, AGOGO, CRASH)
STUTTER TIME
STUTTER DEPTH
TOM DECAY
CLOSED HAT DECAY
OPEN HAT DECAY
Annoyingly there is no option for kick or snare pitch or decay. Could there be a way to mod this?
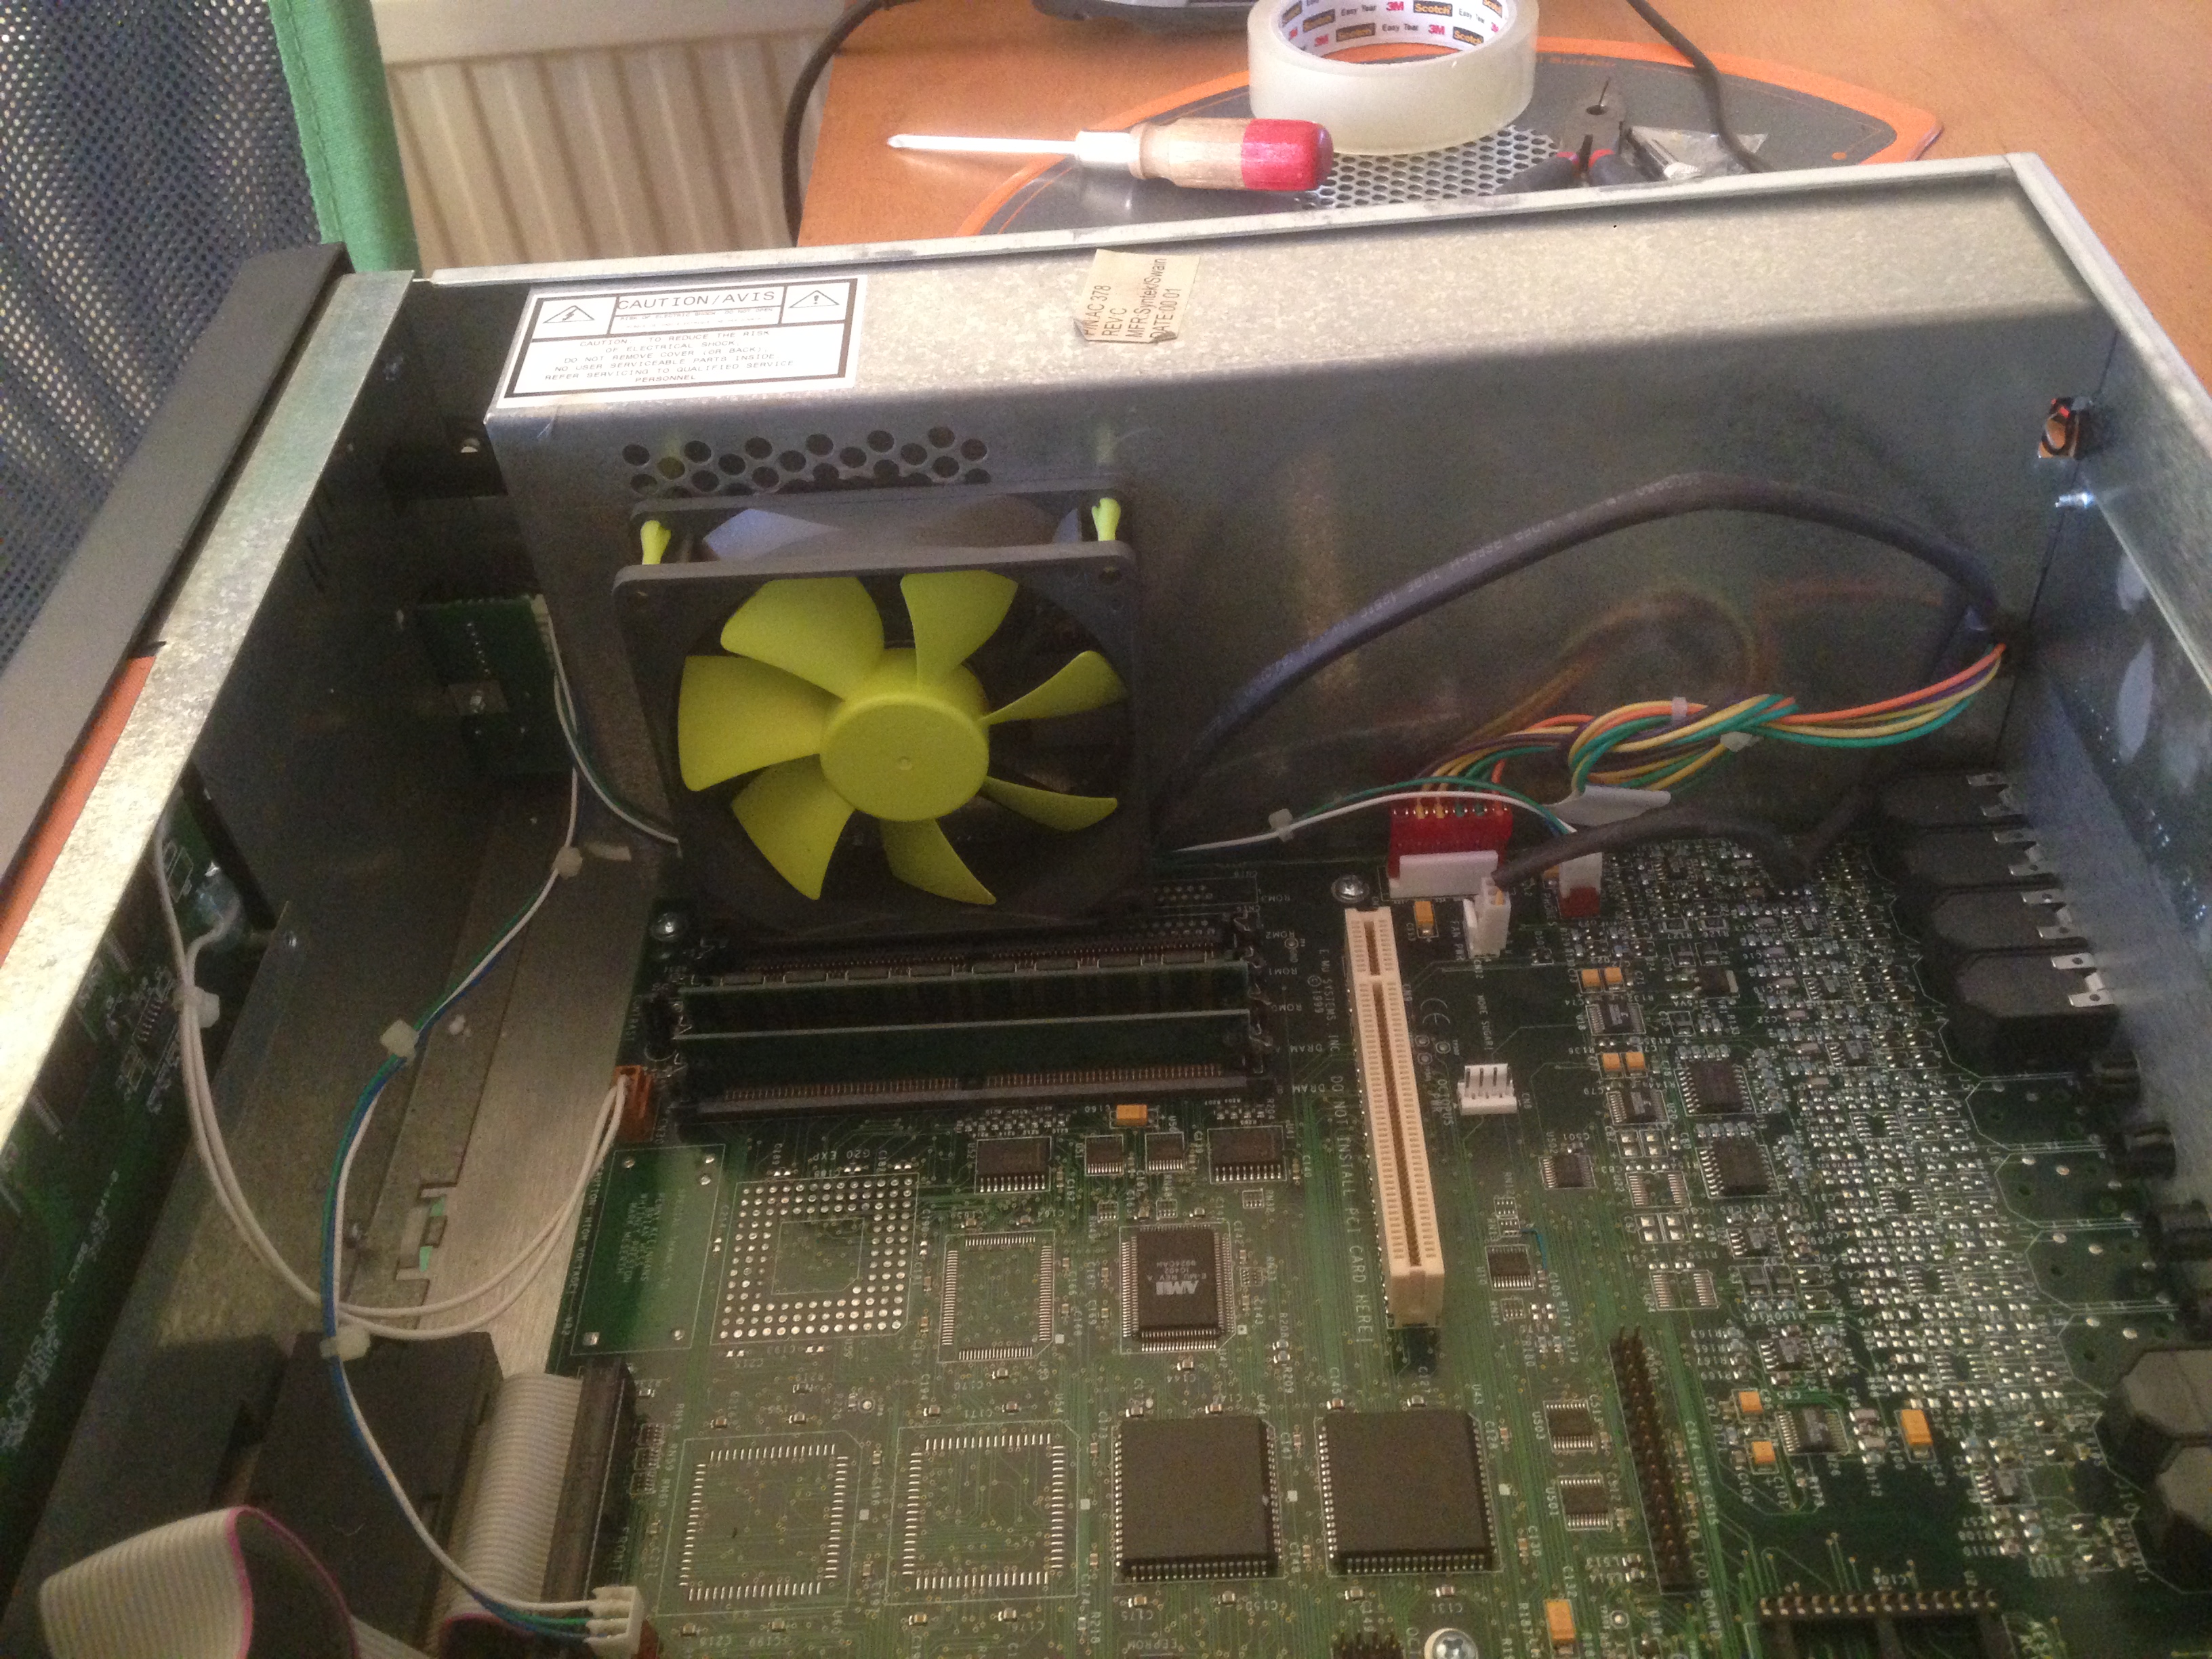
Hello all, I thought I’d document the process of replacing the noisy power supply fan in my E-MU E5000 Ultra sampler with some pictures in the hope that it may be of use to others out there.
All credit goes to GaemethProject‘s video on YouTube for giving me the confidence to try this myself.
First off you’ll need the following tools and components;
It’s worth keeping in mind that the large capacitors in power supplies can retain a charge for some considerable time after being powered off so make sure to wait at least a few hours with the machine turned off and unplugged before attempting access to the power supply. I’m probably over cautious but I’d like to wait at least a day.
Once an appropriate amount of time has passed, you can begin by removing the 7 screws holding the case lid in place, 2 on each side and then 3 at the top of the rear.
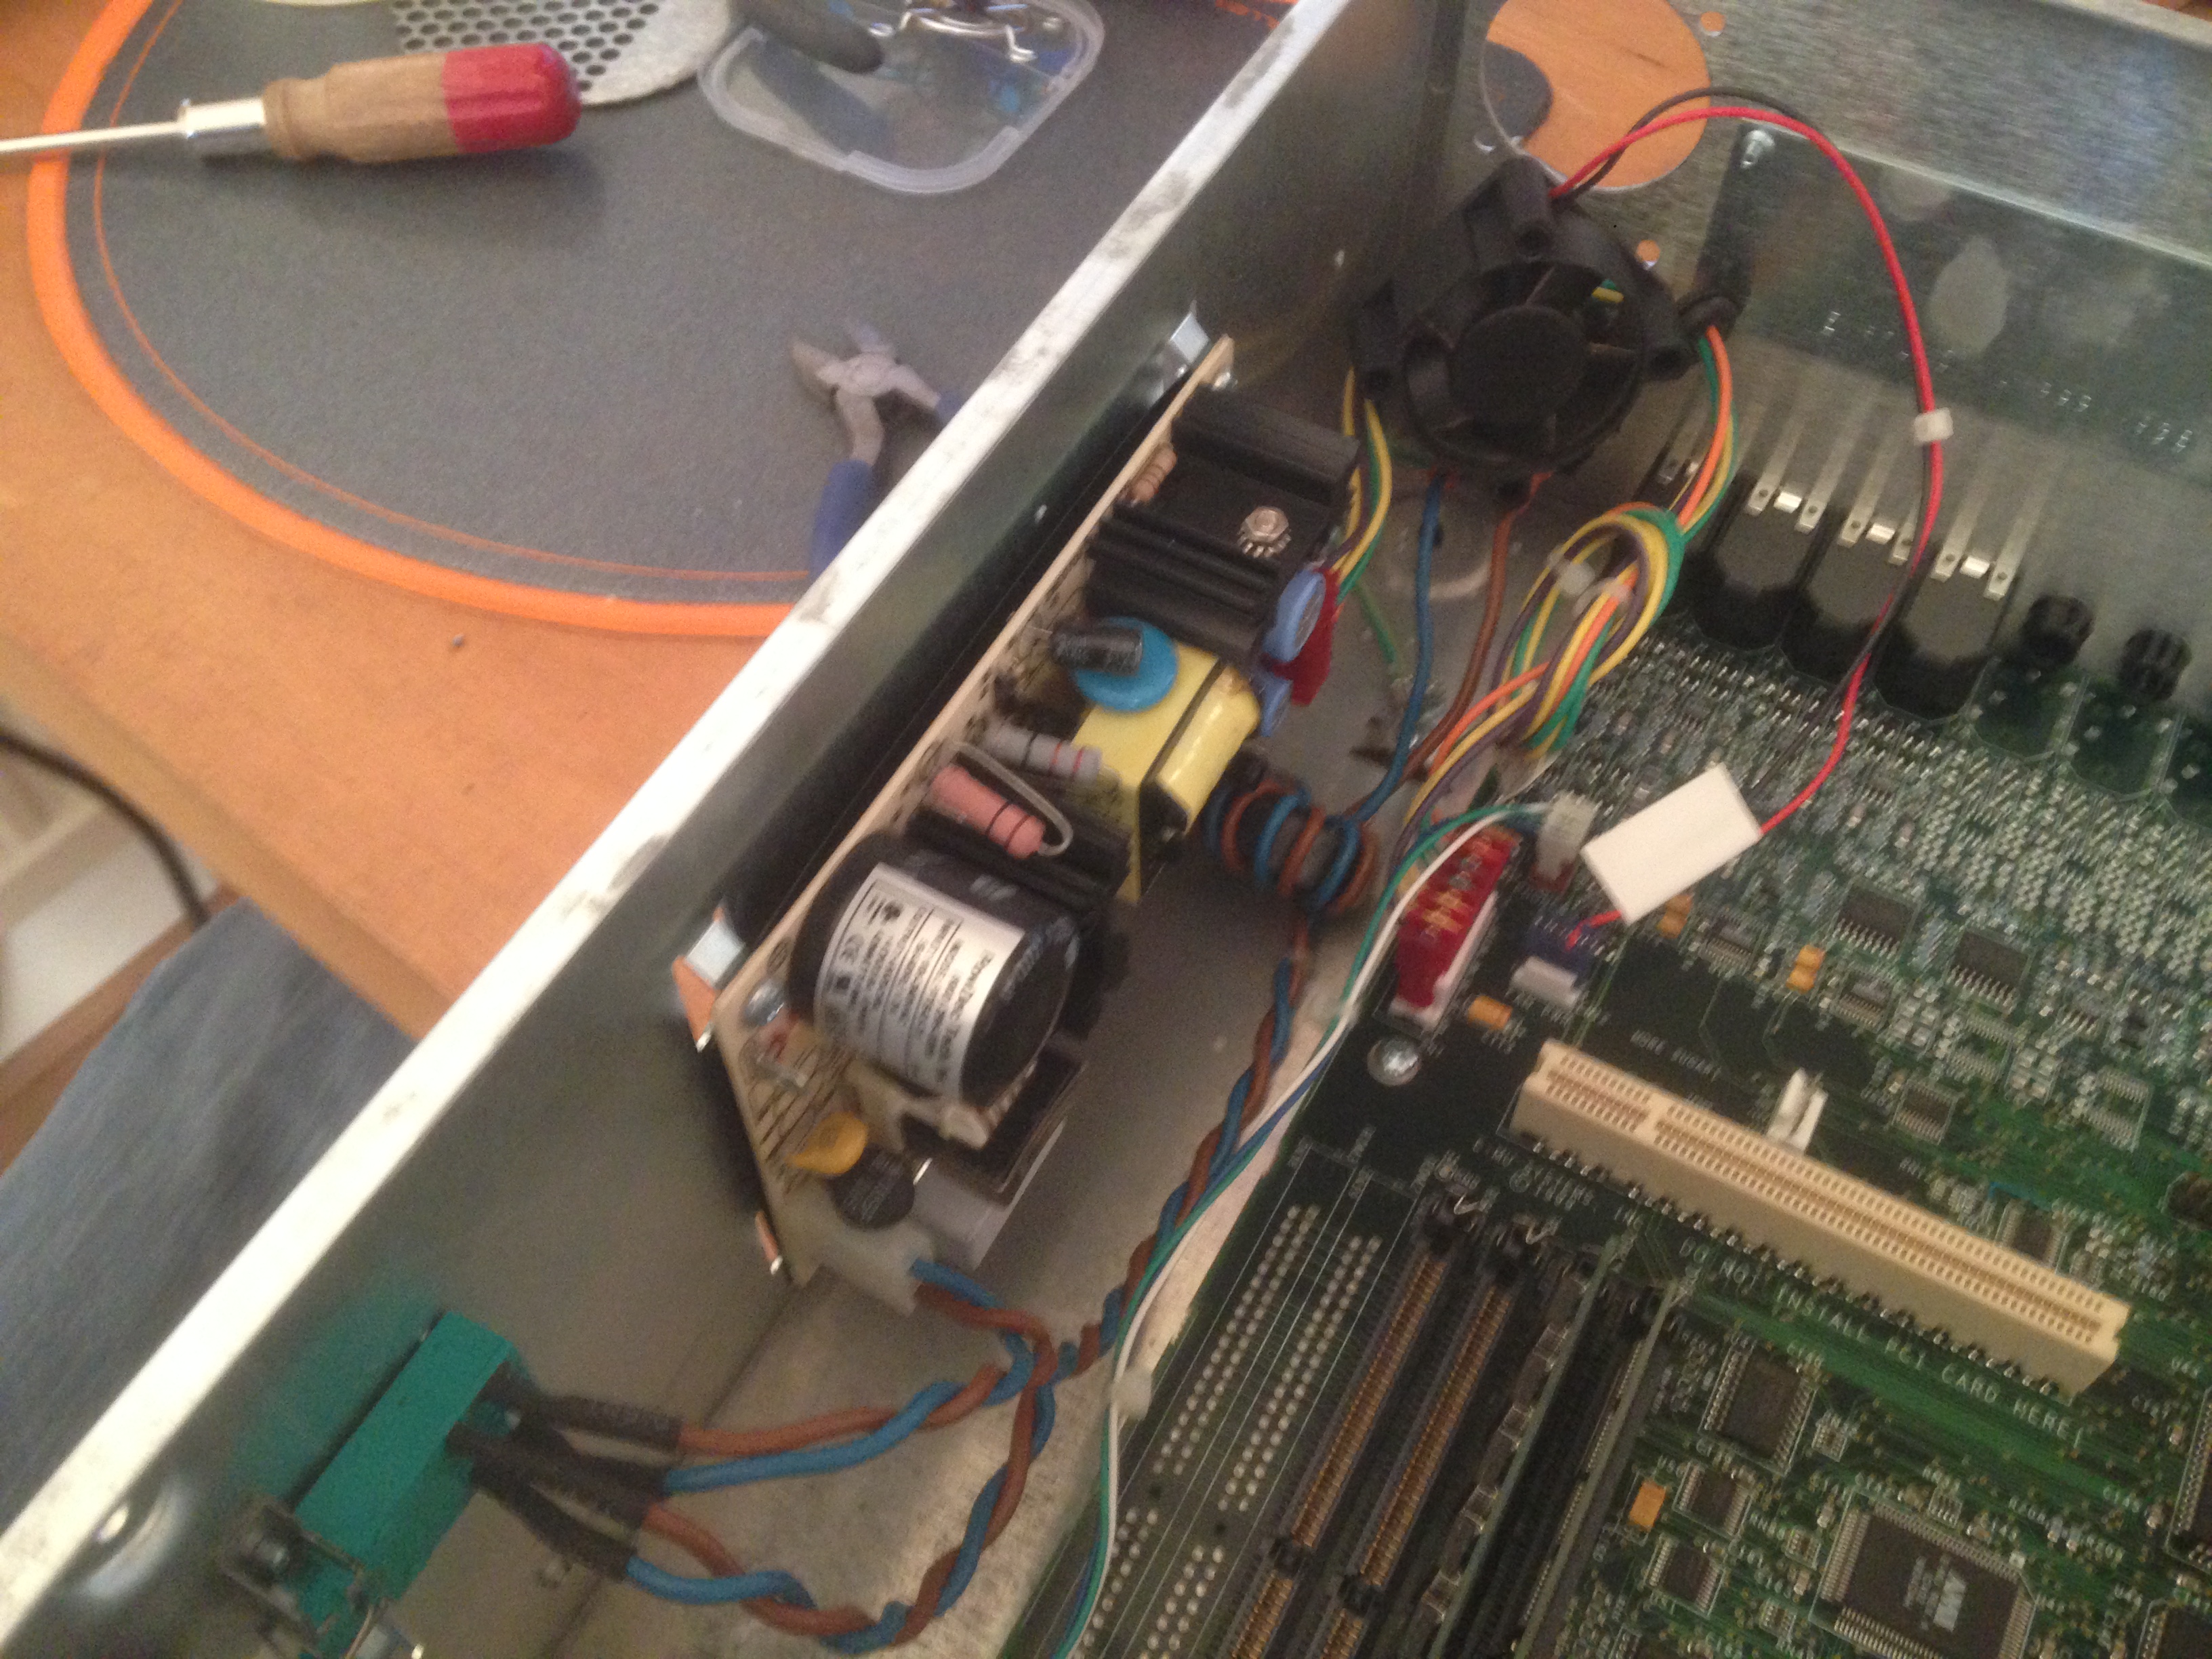
Now that you have access to the inside of the case, you can move to the back and start unscrewing the screws which hold the power supply housing in place. Make sure not to undo the two screws holding the fan in-place until after you have removed the power supply housing.
(Screws holding E-MU E5000 Ultra fan and psu housing in place)
Now with a bit of jiggling you will be able to remove the power supply housing, be careful not to damage any of the cables which are threaded through the housing or the on off switch which is partially housed behind the power supply case but does not need to be removed.
(The power supply revealed)
You can now unplug the fan from the header pins on the motherboard and throw it in the bin. (Ok, you can keep it if you want to but why would you want to?)
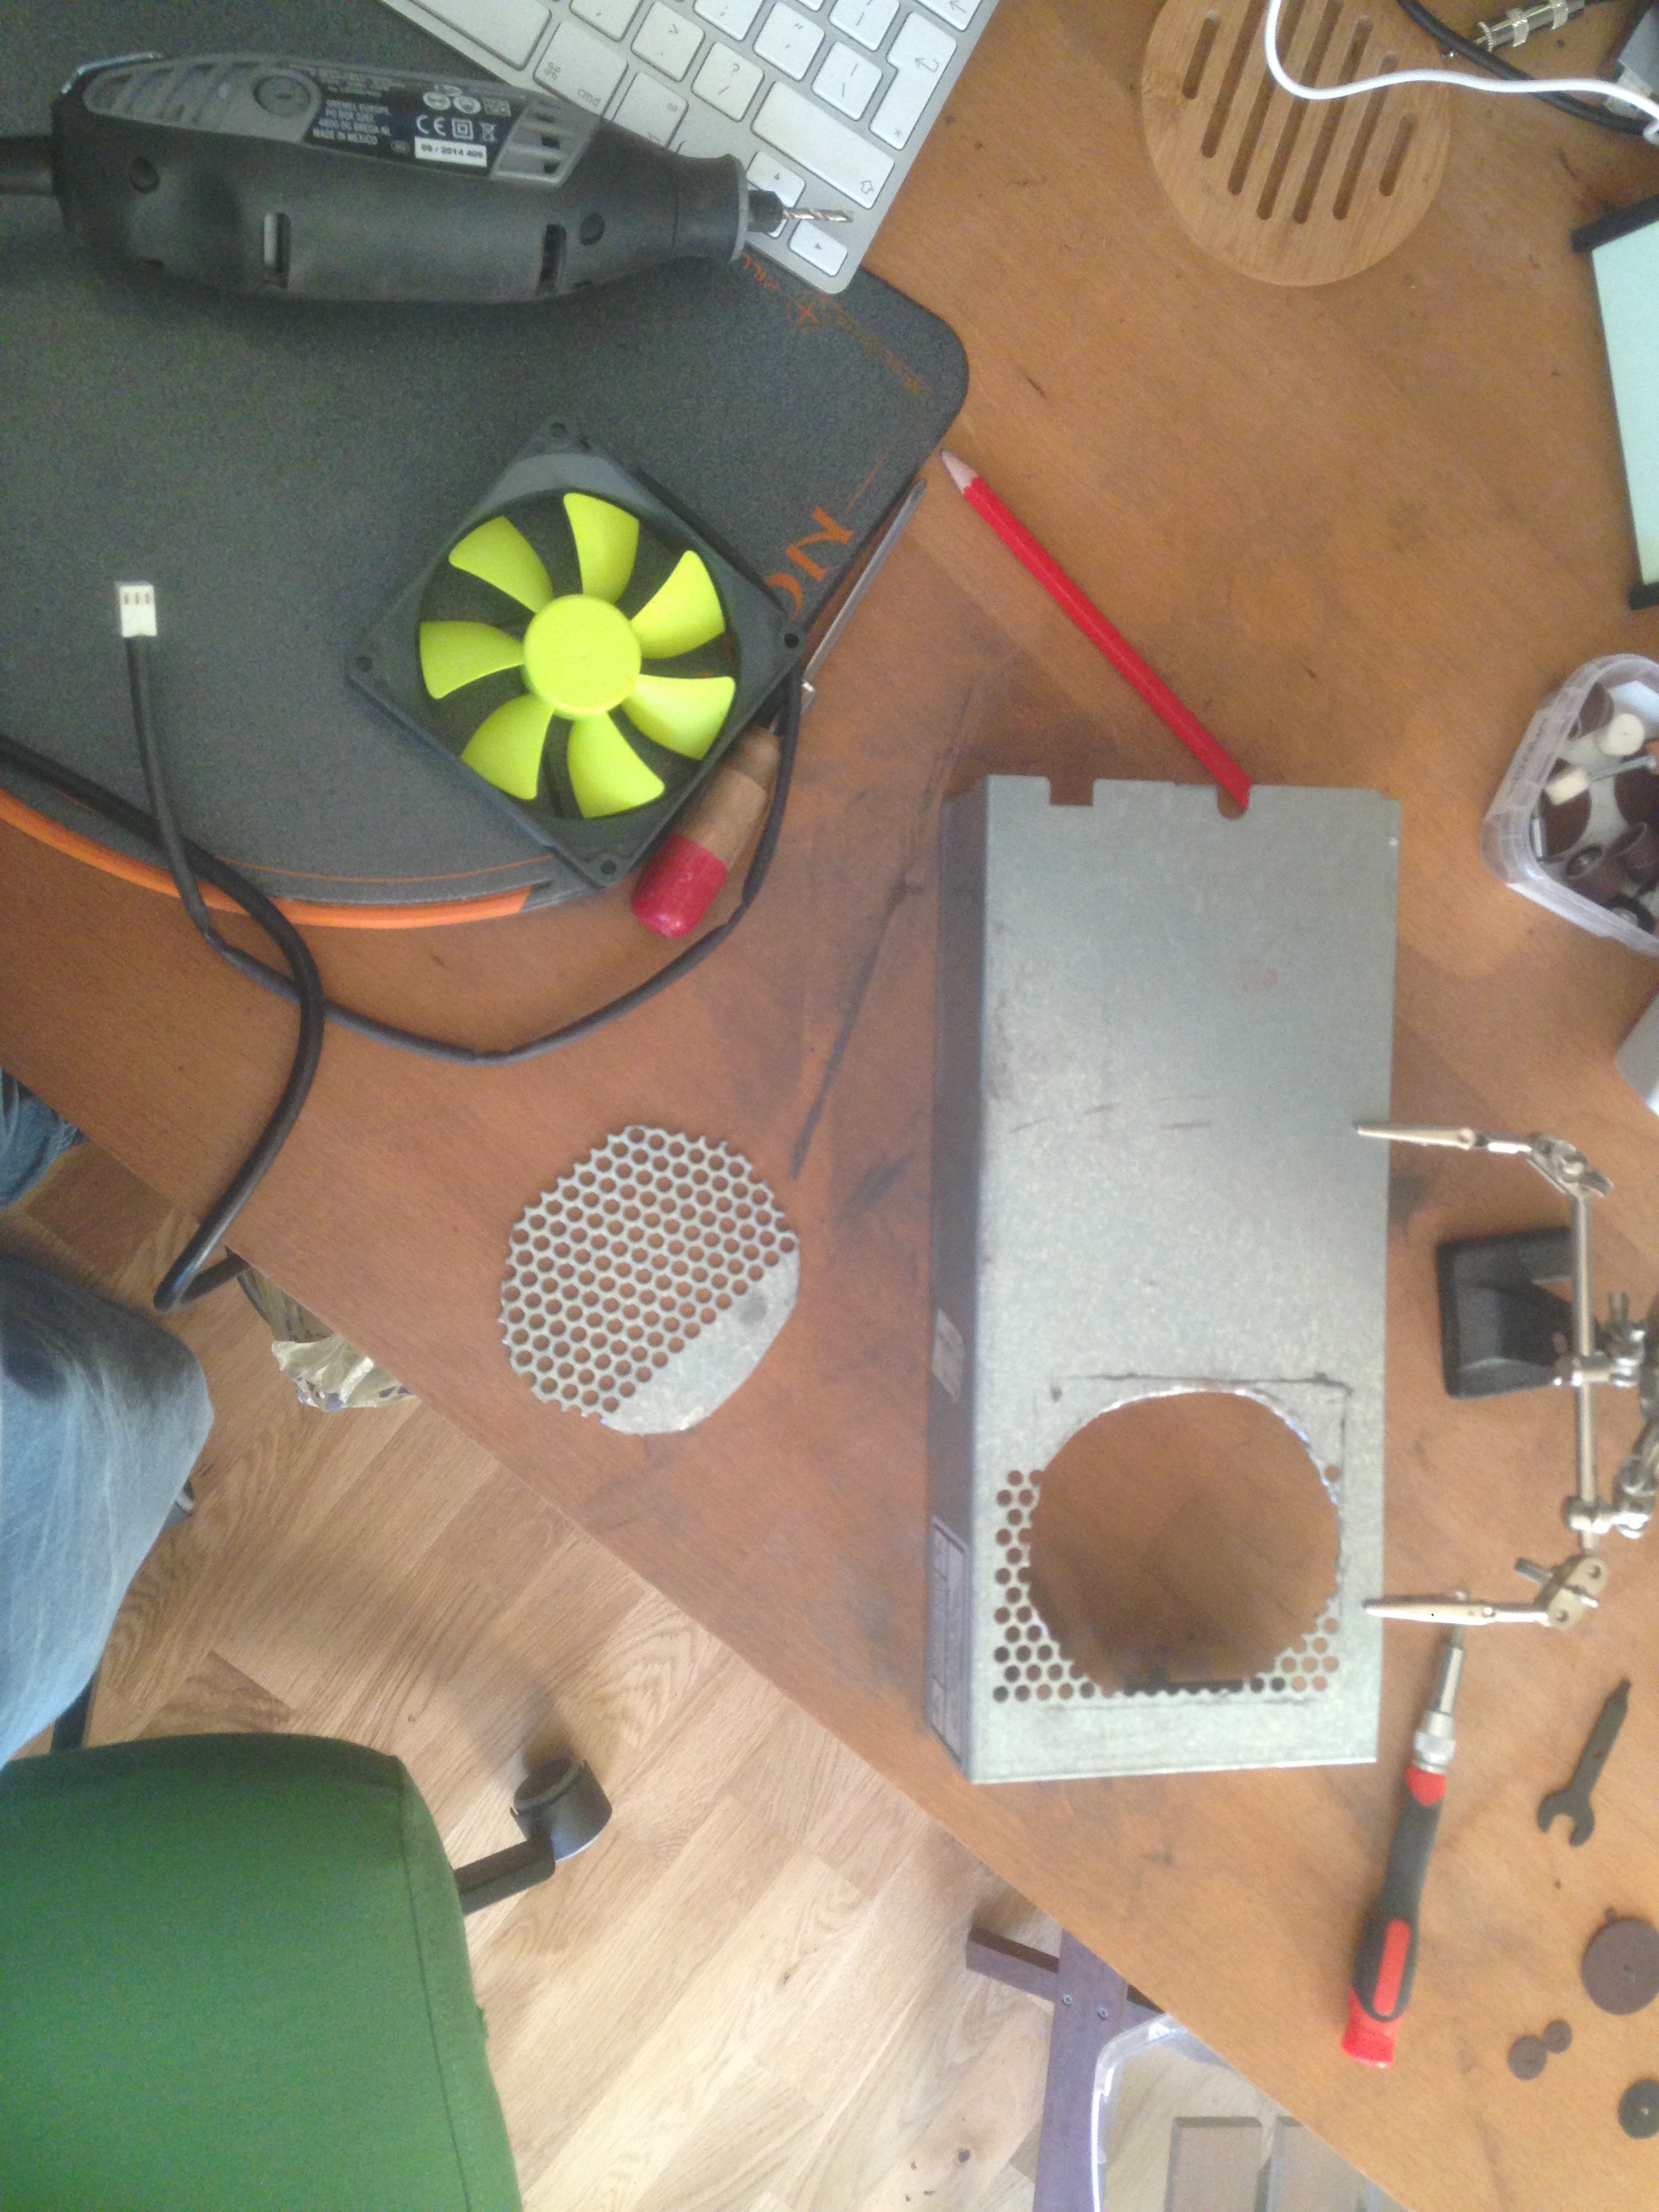
Now that you have the power supply housing free it’s time to get busy with the Dremel. Try positioning your new fan over the grill to to see where it will fit best. You should be able to use two of the holes in the grill for two of your fan fixings.
Once you’ve got it nicely lined up you can try and use a felt tip or pencil to mark up a few guide lines and then cut out the section.
(Section cut out of power supply grill)
You’ll also need to drill two holes for the other two screws of the fan.
You can then attach the fan using the special rubber screws which dampen vibration noise. Any parts of the grill which remain exposed should be taped over to stop airflow. I’ve used clear tape here so it’s not visible in the picture.
(Silent fan fitted to power supply housing)
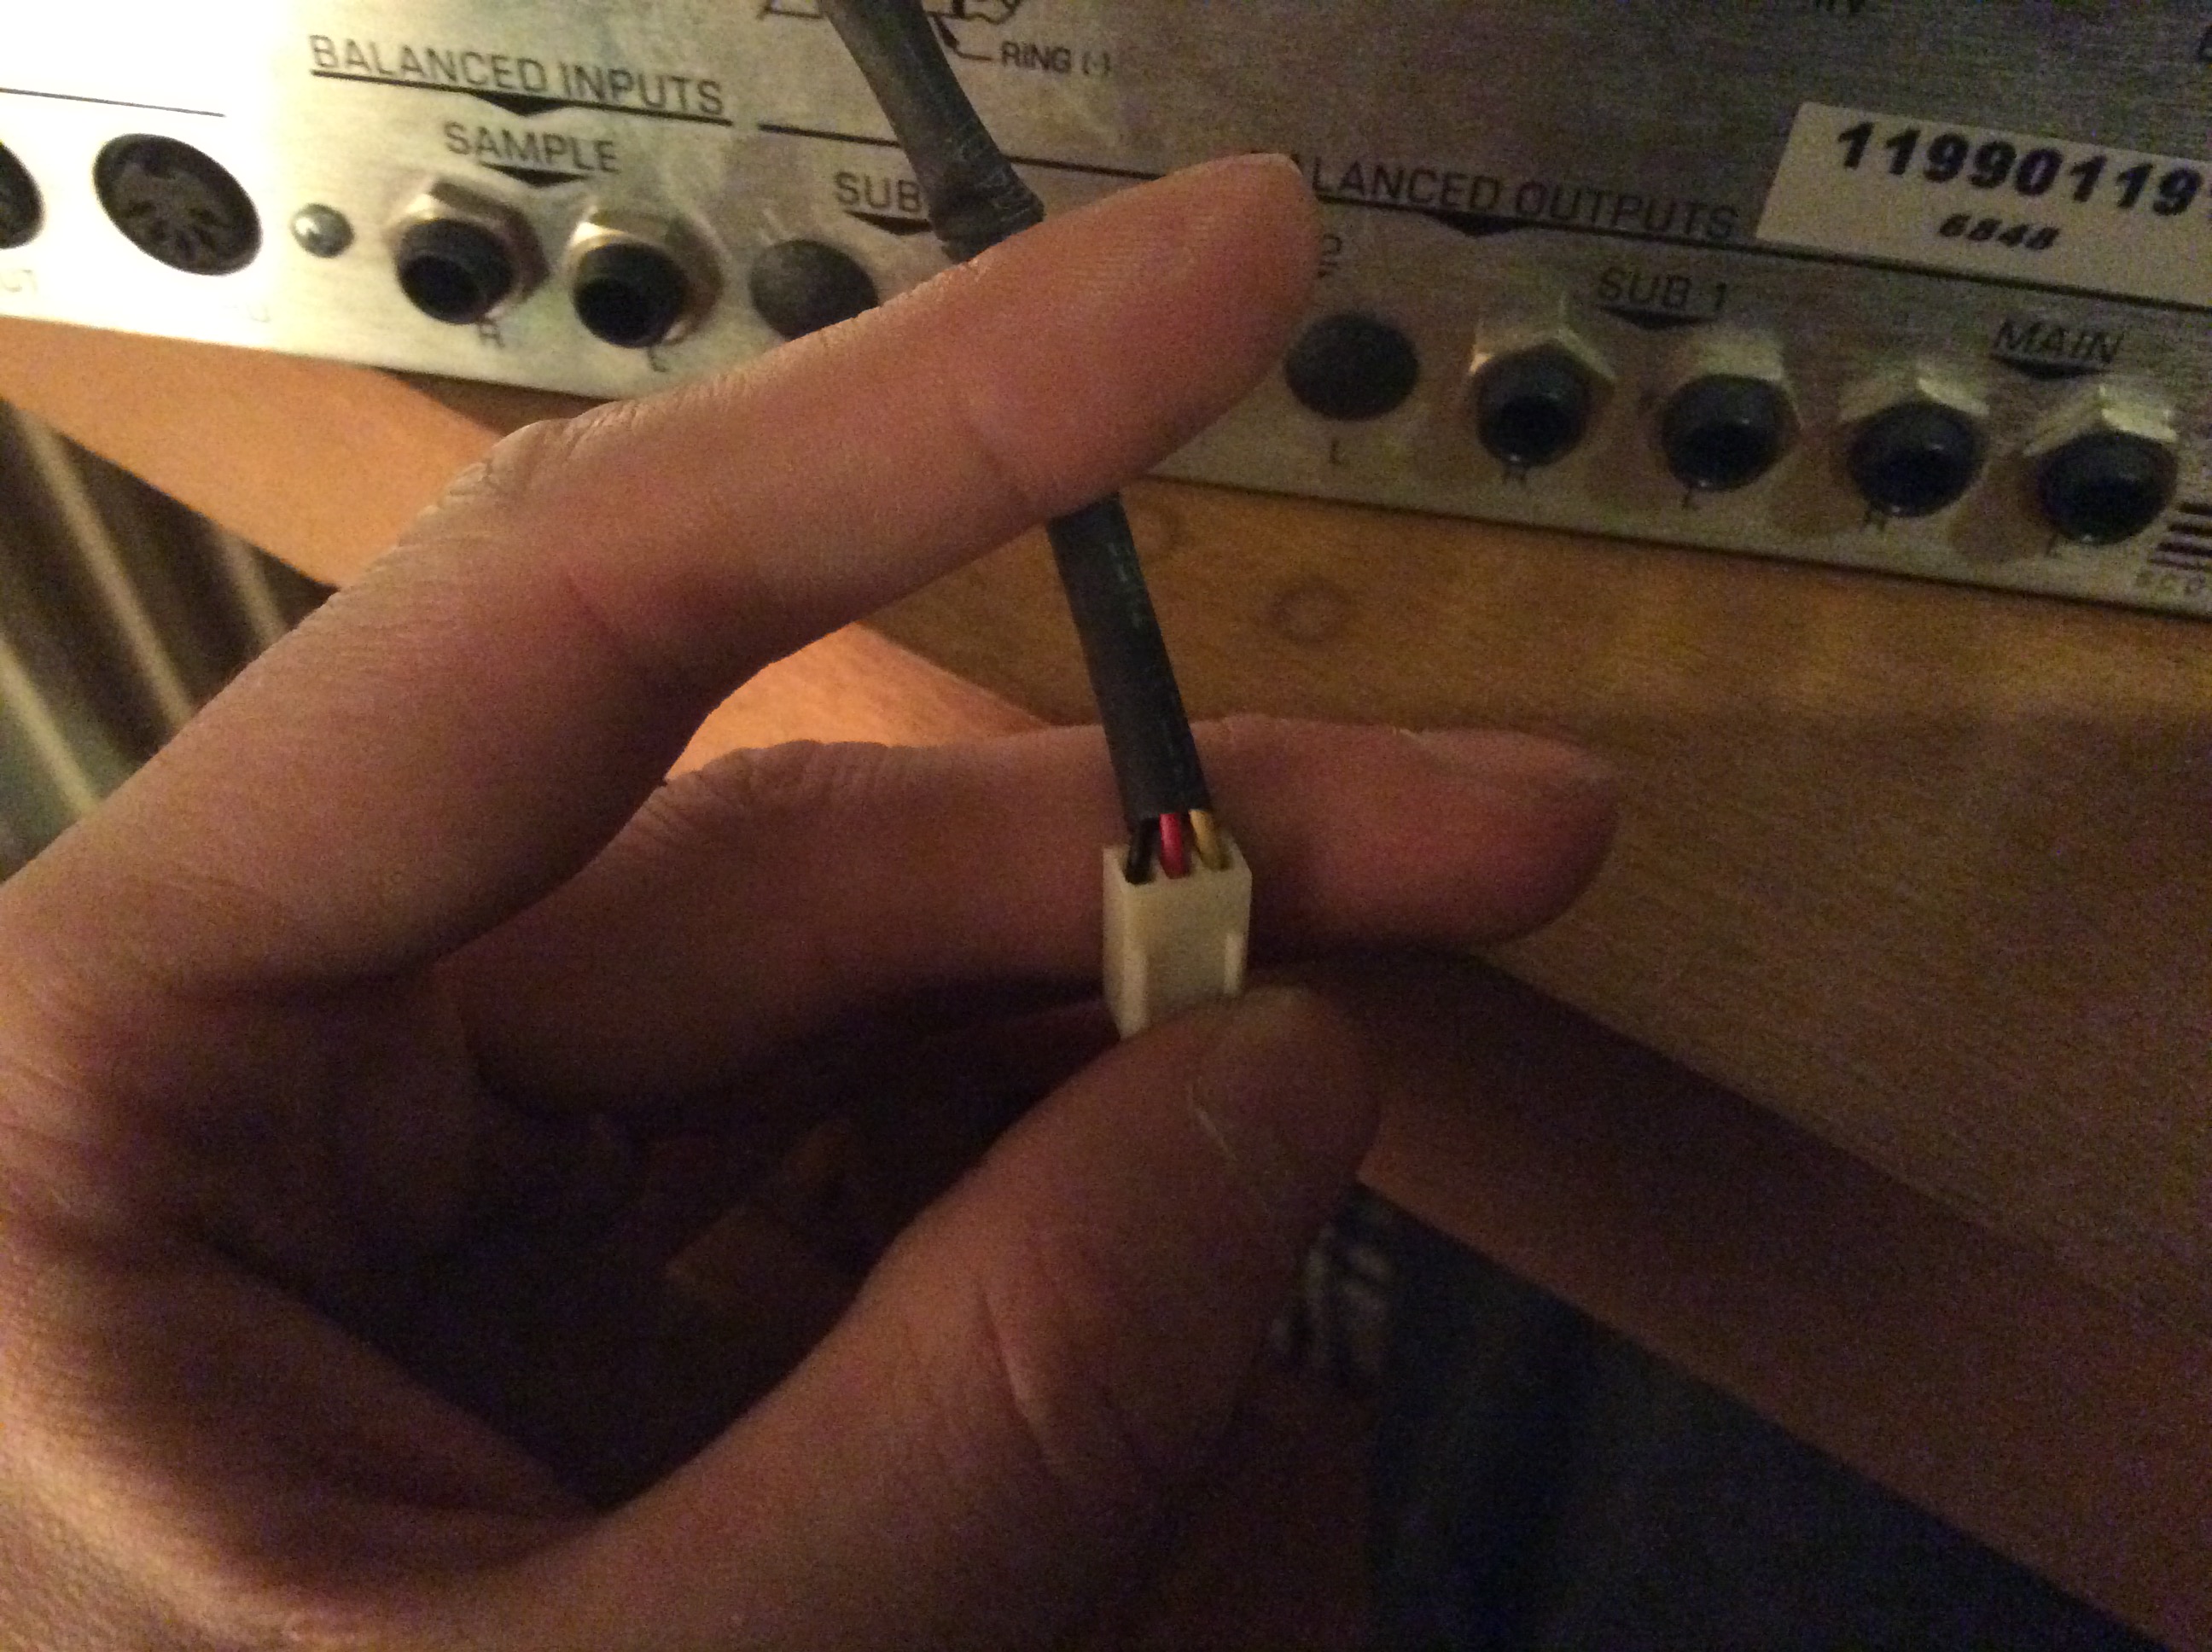
The fan power cable will need to be plugged in backwards to the samplers motherboard, so clip off the two plastic burs on the connector.
(fan power connector, yellow goes to NC, red to +12v, black to ground)
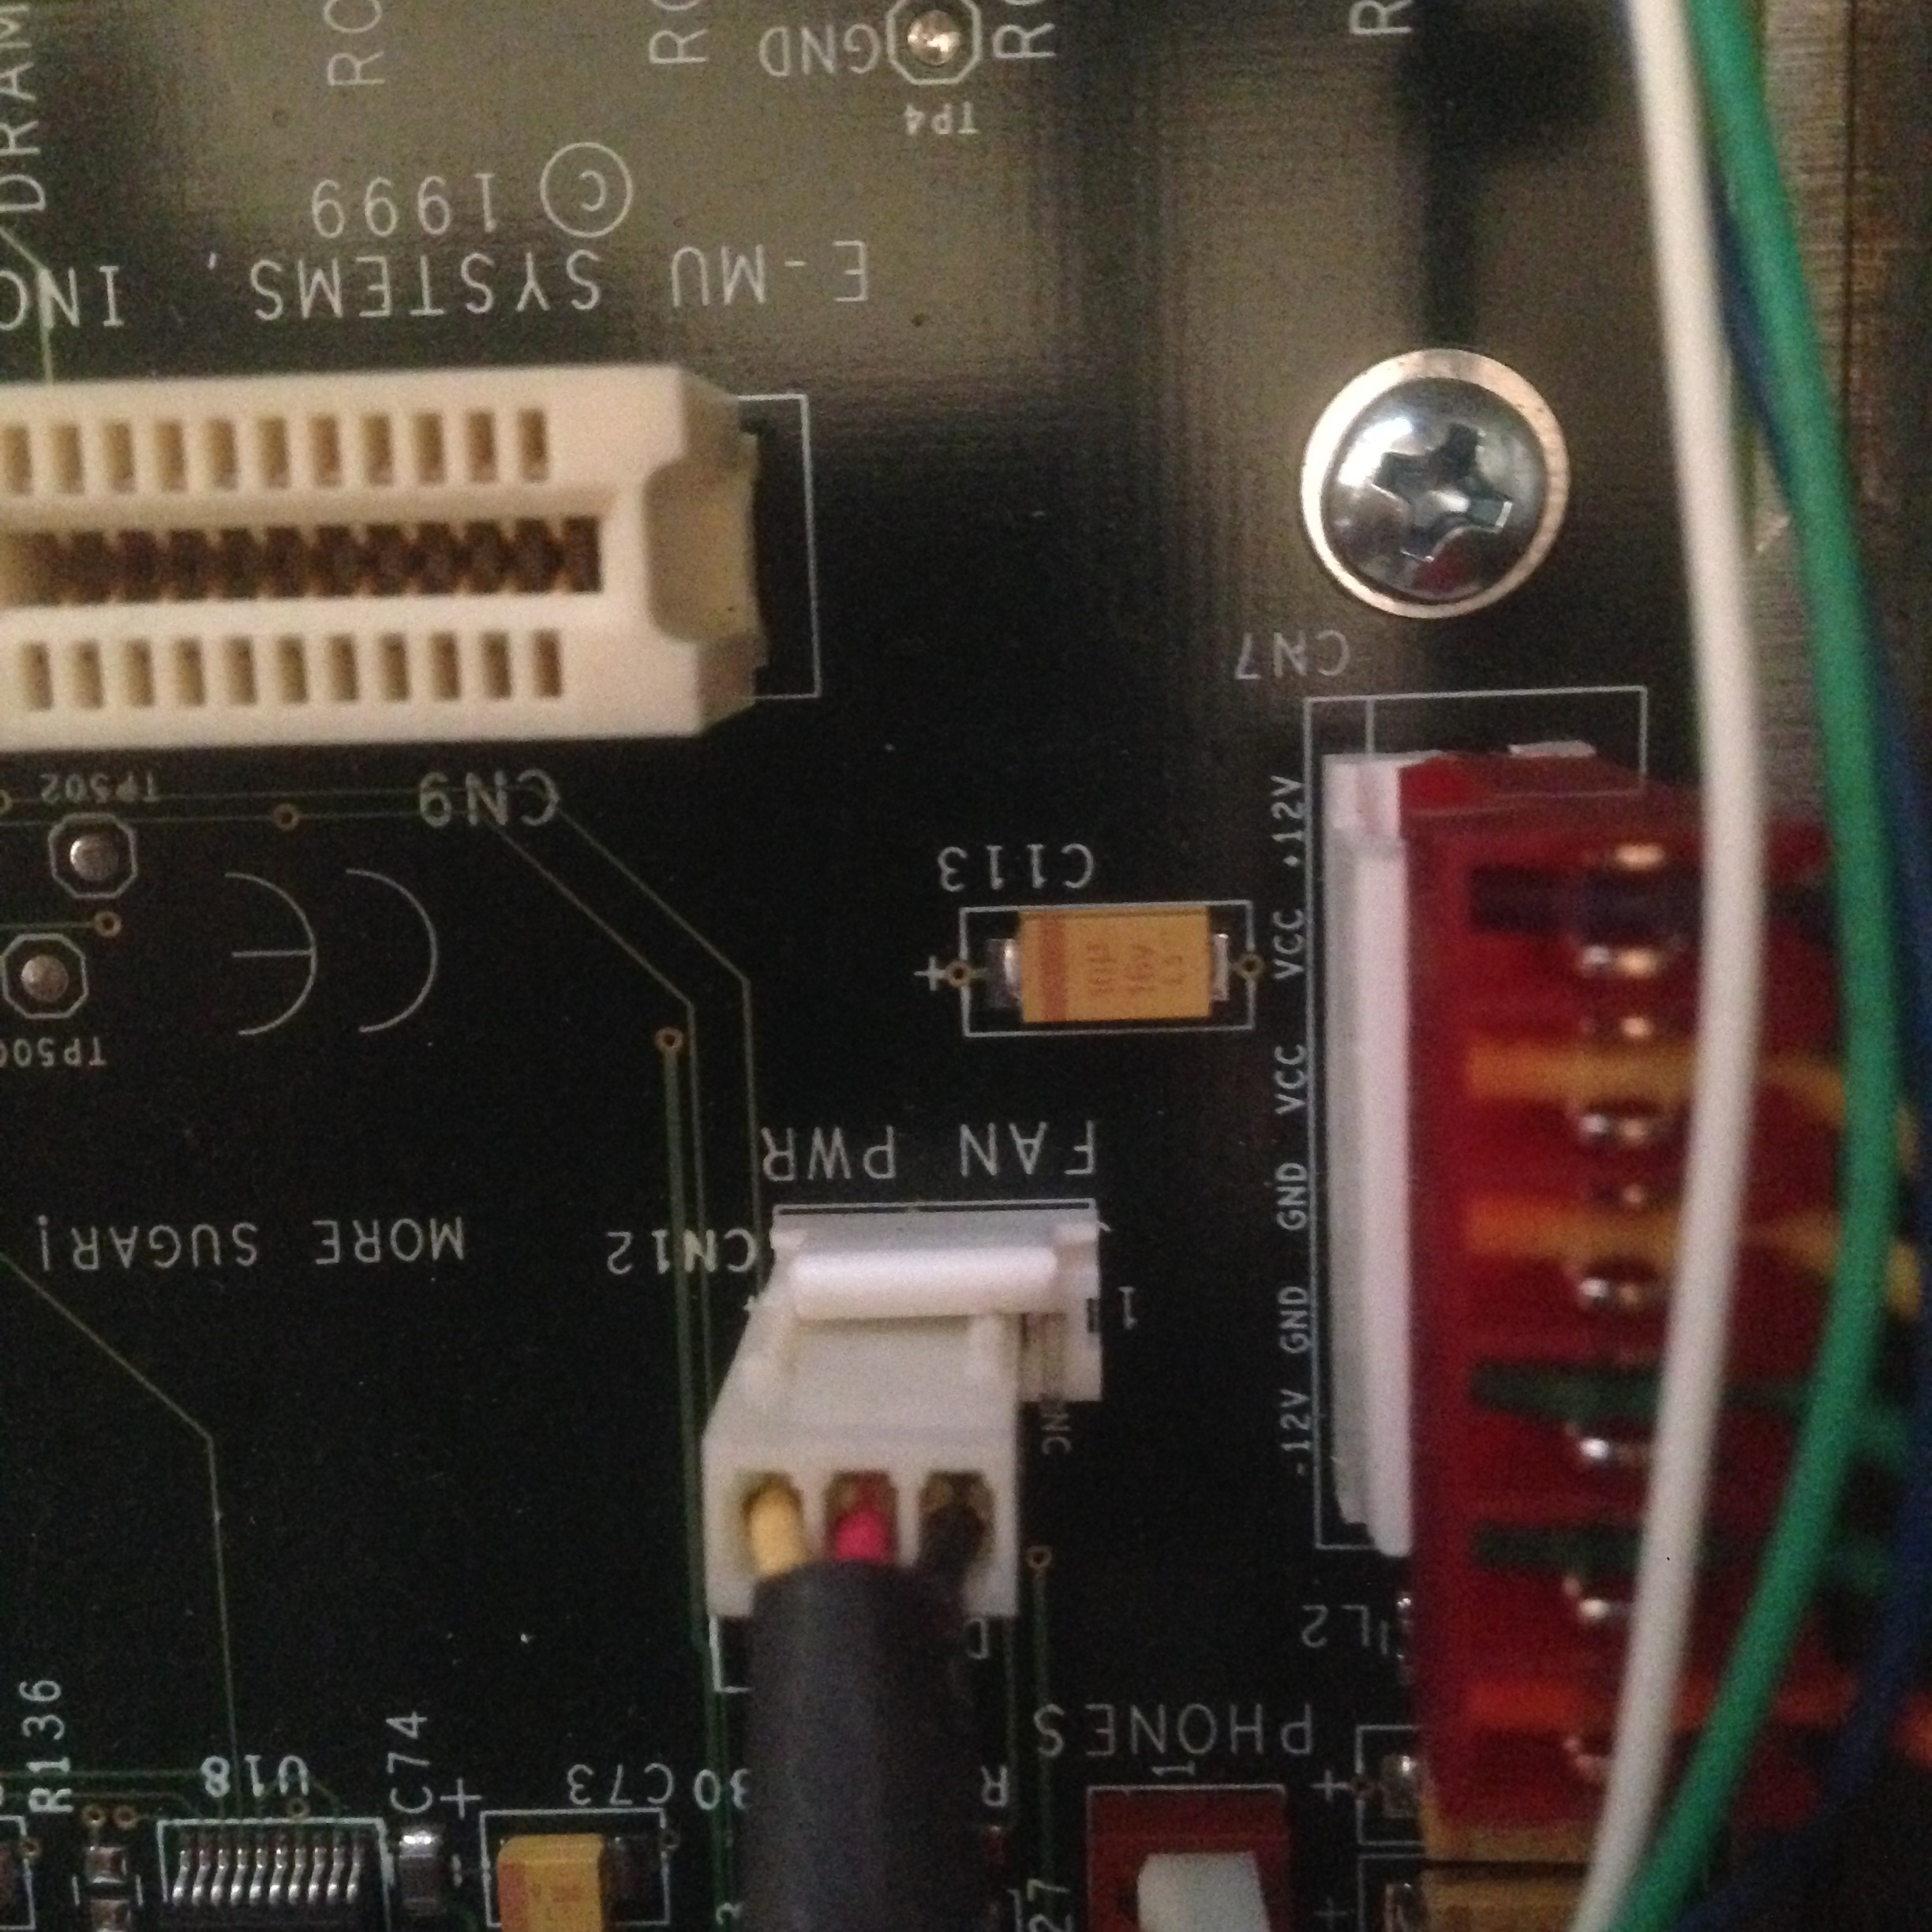
Now connect the fan to the motherboard power header. The motherboard header has 4 pins but the fan only has 3 so you have to be careful to connect it the right way round.
If you are facing the rear of the sampler you want to plug the 3 pin fan connector in to the 3 pins on the left hand side of the motherboard connector, making sure that the side of the fan connector with the removed burs is touching the plastic side of the fan power header.
If you’ve got it the right way round you will be able to see that the yellow wire is going to “NC”, the red to “+12v” and the black to “grnd.”
fan in place
You can now carefully reassemble the case screwing the rear fan grill back on with the two screws and nuts and then reattaching the power supply housing.
Reconnect the power plug and power on the sampler to make sure that the fan is spinning well and not making any noises. If all’s well, power off, screw the case back on and voila.
Enjoy the silky smooth sound of nothing. (Well virtually)
To properly silence this thing, I’ve also done a 2.5″ SATA to IDE mod on the E-MU so that I could get rid of the racket made by my external SCSI drive. I’ll try and document this when I get another free moment.
So after many years of use I’d decided to retire my 20″ 2007 iMac which was starting to show it’s age even with an upgrade to 4GB of ram and from an internal hard disk to SSD and the Superdrive replaced with a 1TB 2.5″ spinning disk.
After seeing the release video for the new iMac on the 17th my interest was piqued enough to pull the trigger and order one.
I wanted the 4Ghz i7 and really once you’ve gone SSD there is no going back, so I didn’t want to risk the fusion drive. (Apple’s software wrapper for an internal 1TB spinning disk and a 128GB PCI-E SSD.)
Instead I plumed for the 512GB SSD, 8GB of RAM with more ordered from Amazon. The one concession I made was to not get the upgraded graphics card, the AMD M295X, instead getting the base AMD M290X.
As it turns out, I am eligible for an educational discount and as such I’ve initiated a return to Apple of the machine I have with an almost identical one ordered with the upgraded M295X.
This gives me the perfect opportunity to benchmark both and compare the results.
Here is the first collection of results for the following benchmarks, unigine valley, unigine heaven, 3dmark firestrike running in both OS X yosemite and Windows 8.1 Enterprise running in boot camp where applicable.
The benchmarks are all run in the highest possible preset available in the free version. This is to ensure that the result are comparable to other machines and not obscured by a myriad of custom settings. I will try and do some hi-res benchmarks at some point as I understand that with this machine especially, there would be interest in this.
The Windows 8.1 benchmarks are something I’ve not seen may other places.
You can also watch an incredibly unscientific video of my opening every app in the applications folder at once. (hint the iMac doesn’t break a sweat). Here
The WordPress.com stats helper monkeys prepared a 2013 annual report for this blog.
Here’s an excerpt:
A New York City subway train holds 1,200 people. This blog was viewed about 4,500 times in 2013. If it were a NYC subway train, it would take about 4 trips to carry that many people.
Well this will be a quick one. I just want to vent my rage at the poor quality of construction of apples new wunder-headphones.
I’ve had my iPhone 5 about 3 weeks and used the headphones a handful of times in that period. Leaving them at home most days. I plug them in this morning and the left headphone is now not working. Totally out of the blue.
No amount of wiggling of cables makes even the slightest amount of crackle making me suspect this is a cracked solder somewhere and not a damaged cable.
So today I was trying to create an archive that someone had specifically requested be in 7zip format from my Linux laptop and I ran in to a few annoying “features” of the very basic p7Zip application availible in most Debian/Ubuntu based systems.
p7Zip essentially only has two command line options, compress or decompress and nothing you can tell it will stop it from deleting the original source file once it’s finished compressing. This is worrying.
Another annoying feature is it’s choice to have no option to choose an output filename. Infact even the utility I’m going to introduce in a second doesn’t have this option either but it’s at least trivial to work around.
If you didn’t already know, 7zip is actually just an implementation of LZMA and LZMA2 compression with the file extention ‘.7z.’
Given this we can use the command lzma (sudo apt-get install lzma.)
Here is the command issued to create a 7zip a file with lzma and then a test decompress with p7zip to prove it works.
(~ $ lzma -kvzc file.tst > file.7z)
Now an explanation of the command one option at a time.
-k, this forces lzma to keep the original file and not delete it once the archive is complete.
-v, verbose output so we can see what’s going on.
-z, this is the option that tells lzma that we want to create an archive.
And finally the most interesting bit;
-c, this option forces lzma to output the file not to a file but to the stdout, this can then be redirected to a file of our choosing using the “> file.7z”. Replacing the filename with whatever you want.